Quantcast
Channel: Gonna Want Seconds
Viewing all 500 articles
Browse latest View live

Kit Kat Cake Recipe

$
0
0

Cut me off a piece of that Kit Kat Cake! A moist, homemade chocolate cake with fudgy frosting makes this candy bar delivery vehicle something special.

Kit Kat Cake Recipe

When it comes to dealing with a serious candy bar craving, there are two types of people. Some believe in moderation, attempting to satisfy themselves with a miniature “fun-size” bar lifted from their kiddo’s Halloween basket (don’t you envy their optimism??). The rest of us know the only way to properly deal with that kind of desire is to indulge in a king-sized, ultra-mega giant candy bar that’s absolutely worth going to the store in your pajamas for. Get ready to up your game, people, with my Kit Kat Cake.

There’s no denying Kit Kats are one of the most popular impulse buys on the checkout aisle at the grocery store. Their light, crispy wafers blanketed in sweet milk chocolate and that catchy jingle are hard to ignore. Kit Kats are pre-perforated into “fingers” for sharing, too, if you’re into that sort of thing.

That States-side popularity is extended all across the world, with over 16 countries manufacturing these chocolatey treats. Kit Kats are the number one selling chocolate bar in Japan (and in 200 different flavors), and, if you’re looking for the biggest bars available to make this Kit Kat Cake recipe Australia sells them in 12-finger packages! They’re popular served with afternoon tea in England, and the airport in Dubai sells more than any other retail store. Anyone else interested in planning a long layover??

Incorporating the chocolate-coated wafers into desserts is a no-brainer, and there are all kinds of Kit Kat dessert recipe options including cookies, blondies, pies, and even creamy dips. But if you’re looking for a stand-out Kit Kat cake recipe taste mine! It uses a homemade chocolate cake and homemade frosting as the centerpiece for tons of Kit Kat “siding” all around the edges. The Kit Kat fence also works as the perfect frame for a little lake of M&Ms on top. It’s an amazing, adorable cake guaranteed to satisfy that Kit Kat craving.

If you do an internet search for Kit Kat cake ideas, you’ll find some no bake Kit Kat cake recipes, similar to tiramisu with Kit Kats instead of lady fingers. The baked versions use an actual cake, but most of these start with a box cake mix and a tub or two of store-bought frosting. I definitely enjoy convenience items, and you’ll see me use them a lot in my recipes, but this chocolate cake is so easy to make, really almost as easy as preparing one that starts with a box, and it’s vastly superior in taste, if I do say so myself!

Using dark brown sugar in this cake batter is a small (but effective) twist on a traditional chocolate cake. From a functional standpoint, it adds an acidic quality that works with the cocoa powder to help the baking soda do what it’s supposed to and make our cake nice and airy. From a taste perspective, though, it adds a subtle molasses flavor and ultimately makes the cake a little more complex than just using granulated sugar.

What kind of cocoa do you want to use? Well, it’s really up to you. Either Dutch-processed (which has had some of the acid removed) or plain will work in this recipe since we’re using both baking powder and baking soda to leaven the cake. All you have to decide is whether you want a lighter or darker cocoa to flavor the layers.

Yes, it’s a snap to make this Kit Kat cake from scratch, and the frosting . . . the FROSTING! It’s equally simple to put together and off-the-charts delicious! Just like the cake, this frosting uses things that are probably already in your kitchen. It’s a fluffy, fudgy frosting, with lots of cocoa flavor that really complements the airy quality of the candy bars. Creamy chocolate frosting on a chocolate cake with Kitkat border? Sign me up!

So, how many Kit Kats for a Kit Kat cake? I suggest buying enough packages to have about 40 fingers. Although 8-inch cake pans should produce pretty uniform results across the board, subtle differences including the thickness of the frosting can change the amount of surface area and the actual number of Kit Kats required.

Kit Kat Cake Recipe

Once you tie a colorful ribbon around the cake to secure the Kit Kats, you’ll top this beauty with M&Ms. This is a great way to use up a bunch of those puny “fun-size” bags you have left over from Halloween, but you can also buy some holiday-themed packages to color coordinate for a party. Definitely don’t restrict yourself to the original milk chocolate version, either, since there are tons of awesome M&M flavors to choose from.

Even though the Kit Kats will be secured to the cake with your decorative ribbon, you’ll still want to chill this cake awhile before cutting into it. It’ll cut much easier once the frosting gets a chance to solidify around the candy bars and candy. You’ll still have some stray M&Ms and Kit Kat crumbs on the plate when you slice your cake, but I promise no one will be complaining!

Recipe Notes:

Kit Kat care – This cake is really a show-stopper, and you don’t want to ruin the visual appeal with lots of finger prints on your Kit Kats. Sure you’ll probably eat one or two pieces while you’re making this cake, but you don’t want it to look like you considered eating every one! I like to break the Kit Kats into their individual fingers, then pop them into the freezer for a few minutes on a tray lined with wax paper to prevent any melting from warm fingers.

Tie it up – The ribbon around the edge of the cake is essential for keeping it all together. Don’t skip it. No, it’s not more chocolate, but you can make it a festive addition to color-coordinate with a baby shower or add a touch of the holidays to your chocolate masterpiece.

Alternative toppings – If you’re not feeling the M&Ms for some reason, there are lots of other options. Chocolate’s pretty much a neutral canvas to work with! You can make a Kit Kat cake with strawberries, either sliced or whole, or you can pick up an alternative on the candy aisle. This cake works with Whoppers, Reese’s Pieces, chocolate truffles, mini-Oreos, or chopped peanut butter cups. You can even break up more Kit Kats on top to make sure there’s some classic Kit Kat crunch in every bite!


The post Kit Kat Cake Recipe appeared first on Gonna Want Seconds.


Caramel Stuffed Brownies

$
0
0

This is your ticket to brownie bliss – a rich, fudgy brownie wrapped around a thick, buttery caramel layer and topped with crisp pecans and chocolate chips. Bring on the sweet, sweet chocolate coma!

Caramel Stuffed Brownies

Politics and football are two divisive topics we usually try to avoid at family gatherings. There’s only one thing more polarizing, something that makes tempers flare and parties retreat to their opposing corners with extreme prejudice.

Brownies. Some connoisseurs are staunch purists, requiring a thick, fudgy square of chocolate without any nuts, marshmallows, or even chocolate chips to get in the way. Others are mavericks, incorporating everything from cream cheese swirls to chili powder, even stuffing brownies with cream-filled cookies, macaroons, or peanut butter cups.

Some demand leavened, light cakey confections, while others prefer brownies so soft and gooey you have to eat them with a spoon.

I like to consider myself a moderate, so I can eat, bake, and love them all!

This easy recipe for Caramel Brownies has enough fudgy chocolate to win over the purists, with a sticky-sweet caramel filling and lots of chocolate chips and pecans for those who enjoy contrasting flavors and textures.

These brownies are truly epic – rich, decadent brownie heaven, and this may just be the recipe that unites us!

Origin stories are often hard to track down, but one commonly accepted version traces brownies to The Windy City. Like all good things, brownies were developed at a fair, the Chicago World’s Fair in 1893 (also called the World’s Columbian Exposition), to be exact. Fairs are a well-known breeding ground for mind-blowing culinary discoveries, things like Frito pie and fried everything, so it’s no wonder brownies popped up here.

They were a snack commissioned by Bertha Potter Palmer (whose husband owned the Palmer Hotel in Chicago) as a portable chocolate cake to share with the Ladies Board of Managers for the Exposition. That recipe was preserved, and the brownies are actually still served at The Palmer House Hilton in Chicago.

They also served as a catalyst for the chocolate-loving bakers on the planet to head into their kitchens for some seriously tasty experimentation.

Nowadays you can find brownie bits suspended in pints of ice cream, cleverly disguised as cereal or granola bars, or as a crust for cheesecake.

You’ll also find plenty of box-mix options for whipping up a pan of brownies with little more than eggs, oil, and a little stirring. The truth is, I think using the mix has made us forget just how easy it is to make brownies from scratch! There’s really no comparing the quality and satisfaction of cutting into a fresh pan of homemade brownies vs. something that started with a mix (plus you’ll miss out on sneaking in a nibble or two of the chocolate chips while you’re working on that batter).

Although the end result here is a sophisticated, magazine-cover-worthy brownie. They really are simple to put together, so save your box mix for another day.

From an ingredients perspective, brownies are basically chocolate cake with less leavening and flour and a lot more chocolate.

The type of fat and chocolate used are really what separates soft, chewy brownies from those with a fudgy, firmer texture.

Just think about what the ingredients look like at room temperature. If you use chocolate and butter, you’ll have a more solid result; if you use oil and cocoa powder, it’ll be softer.

This recipe is “firmly” in the butter and chocolate camp, which produces a rich chocolate layer substantial enough to bookend the caramel filling.

Most cakes start with creaming butter and sugar, but many brownie recipes melt the butter first. The creaming process adds air to the batter, which makes the end result more cake-like, and we don’t want light and fluffy brownies here.

We’re looking for dense, fudgy bites of chocolate. To ensure they’re as rich as possible, you’ll use bittersweet or semisweet chocolate. These higher-cocoa content products are less diluted with sugar and milk and carry hefty notes of all the fruity, nutty, slightly bitter flavors we love about chocolate.

The filling is a simple combination of melted caramels and heavy cream, but it adds a lovely, luscious texture that contrasts nicely with the fudgy brownie layers.

You’ll need to bake half of the brownie batter in the bottom of the pan before adding the caramel so the bottom is stable enough to support the liquid gold. In the end you’ll be grateful for the stability it provides and the ability to eat these with your hands instead of messing up utensils.

The topping for these scrumptiousS, life-changing Caramel Brownies is a combination of chocolate chips and chopped pecans (toasted, of course) to create creamy little bites of solid chocolate and a nutty crunch so perfect even no-nut brownie advocates will approve.

I could talk about how long these will last, but let’s be honest. They’re not going to last long.

They’re a highly sought after holiday gift among my friends and family, so just be warned that sharing these with others will mean repeated requests for more!

Caramel Stuffed Brownies

Recipe Notes:

Caramels – Unwrapping 45 to 50 caramels can be a bit of a pain, and enlisting the help of others may result in disappearing caramels. One tip is to put the bag of caramels in the freezer for a few minutes to help the wrappers come off more easily. If you have a lot of caramel projects on the baking agenda (which I often do during the holidays), you can also find blocks online or in specialty candy stores to save some time.

Eggy stuff – Overbaking is one of the quickest ways to ruin baked goods, including brownies, so managing the cooking time as much as possible is important. Having your refrigerated ingredients (specifically eggs, in this recipe) at room temperature will help here. If you’re like me and forget to take out your eggs ahead of time, you can place them in a bowl and cover them with warm tap water for 10 or 15 minutes.

Muffin Tin Option – You can cook these brownies in muffin tins, either greased or lined with cupcake wrappers, as either a futile attempt to mitigate your own intake or to make gift-giving a little less messy.  Depending on your oven, they may not need to cook as long, though, so I’d suggest shortening the first bake to 15 minutes, then bake them another 15 minutes after adding the caramel layer and remaining batter. Just watch them carefully and remove them from the oven once you get a clean toothpick out of the top.

Source: Mel’s Kitchen Cafe Also Published on Centsless Meals

The post Caramel Stuffed Brownies appeared first on Gonna Want Seconds.

Mississippi Mud Cookies

$
0
0

The ol’ Hospitality State and its muddy claim to fame provides inspiration for these marvelous Mississippi Mud Cookies. With two kinds of chocolate, crunchy pecans, and toasted marshmallows, you’ll up your cookie game a notch or two!

Mississippi Mud Cookies

If you’ve never heard of Mississippi Mud, you’re probably thinking it can’t possibly be something you’d eat. If you are familiar with this niche of the dessert world, though, that phrase has transported you to a fudgy fantasy land . . . fluffy chocolate clouds floating in a vast chocolate sky in Cocoa-ville. Think “Death by Chocolate” but with marshmallows.

The desserts, which cover every possible sweet treat from ice cream and brownies to cakes and pies, are all as rich and dark as that hard-to-pronounce river, and they’re enjoyed equally among folks both east and west of the mighty Mississippi.

Although the history of these recipes is pretty muddy as well, the mud cake probably came first, and probably not until sometime in the 1970s.

Mississippi mud cake starts with a fudgy, cake-like pan of brownies, usually with nuts (and usually pecans since this is a Southern recipe), with marshmallows sprinkled on top as soon as the brownies leave the oven. The brownies are topped off with a warm chocolate icing that traps and softens all those (now gooey) marshmallows.

The pie people brought their offering to the dessert table shortly thereafter. Most of these start with a chocolate cookie crust or a flourless cake bottom, with chocolate mousse-like fillings, whipped cream, some marshmallows somewhere, and a generous drizzle of fudge sauce or ganache. It’s the kind of thing chocoholics just can’t say “no” to.

What I’m sharing with you today is something that doesn’t have to be refrigerated or cooked in casserole or cake pans with layers of frosting. This is as simple as you can get and still experience the magic of the mud: Mississippi Mud Cookies.

The cookies are rich and chocolatey thanks to melted semisweet chips incorporated into the batter, with crispy toasted pecans and milk chocolate chips folded in, and toasted marshmallows dotting the surface.

The cookie dough itself is a pretty standard recipe that starts out with creaming butter and sugar. I know it’s tempting to rush this step, especially when there are just a few minutes between dough-making and taking a bite of these fabulous cookies, but taking 3 – 5 minutes to fully combine the two will actually make a difference in the end result.

The sugar should dissolve, with almost no grainy texture left behind.

The creaming also adds tiny air bubbles that get trapped in the butter and ultimately help these puppies rise a bit in the oven, along with the baking powder. Speaking of which, if your baking powder is more than 9 – 12 months old, replace it. It’ll lose its oomph over time and limit the height of your spectacular baked goods.

I actually like to write the date on mine with a little Sharpie when I open it just so I can keep track.

Another little tip is measuring your flour correctly. I’ve been guilty of scooping my cup into the canister or bag to measure, but you’re actually getting a little too much flour when you do this.

The only-slightly-more-time-consuming method of spooning the flour into the cups, then leveling it off with a knife or offset spatula, means more accurate measurements and more consistent baking results.

I know there are some chocolate purists who love the rich, extra dark varieties, but you’ll want to stick with semisweet in the dough. Semisweet has about half as much sugar as cocoa and around a 70% cocoa content.

Switching out something like bittersweet would throw off the sweetness here, and Mississippi Mud is nothing if not a sweet treat!

Mississippi Mud Cookies Recipe

You can, however, experiment with the solid chips that get folded into the dough. Milk chocolate works great, and I love the juxtaposition of the two different varieties in these cookies. If you’re feeling sassy, though, you can use more semisweet or an ultra-mega dark variety; just know it will change the flavor profile a bit and may melt a little differently.

Onto the nuts! Pecans are the only major tree nut grown (naturally) in the states, and they definitely have a love affair with them in the south. One of the first production and trade areas in the U.S. was New Orleans, right on the mouth of the Mississippi, which is also the home of the famous pecan pie.

It’s basically blasphemy not to include them in this cookie.

Depending on where you live, these might be pricey, though, so you can substitute walnuts if you need to. Regardless of which you choose, I recommend toasting them first. With all the chocolate going on, it helps to have the nut flavors concentrated a bit to stand out.

Rather than fold our marshmallows in with the nuts and chips, we’ll press a few into the top of each cookie. If the squishy things are buried under dough they won’t be exposed directly to the heating element, and you’ll miss out on the toasting effect.

The tops of the marshmallows should get nice and brown during the baking process – s’mores level quality, and the caramelization will add that wonderful toasted flavor to our chocolatey goodies.

I prefer lining my baking sheets with parchment paper or Silpat, rather than coating them with cooking spray. If you have some of those old cookie sheets with a nice dark patina (the ones you’ve had for decades that used to be silver), the spray doesn’t work consistently.

Parchment’s perfect every time!

That’s all there is to this recipe! Just baking and waiting on things to cool before snatching them off your cooling rack and indulging in a little Mississippi Mud.

This recipe is a welcome deviation from the old chocolate chip standby and will leave you dreaming of all the other ways you can bring a little more “mud” into your kitchen.

Mississippi Mud Cookies Recipe

Recipe Notes:

Toasting – I think a lot of people skip the toasting step because they think it’ll take too much time, but it’s fast and totally worth it! If you have lots to do, place them on a baking sheet (parchment-lined, of course) in a single layer, and bake them in a 350 degree oven for 10 – 15 minutes, just until they’re fragrant and darkened slightly. Extras are great for snacking or will keep on the counter or in the fridge for several days. If you only have a handful to do, use your stovetop. A skillet, set on medium, will toast a single layer of nuts in about 5 minutes. Toss them a few times to prevent burning.

Originally published on Centsless Meals

The post Mississippi Mud Cookies appeared first on Gonna Want Seconds.

Steak Pizzaiola Recipe

$
0
0

Steak night mingles with pizza night in my sensational Steak Pizzaiola. A chunky tomato sauce, full of robust flavors and aromatics, coats tender slices of strip steak in this authentic Italian dish.

Steak Pizzaiola Recipe

Steaks were practically made for the grill, basting in their own juices over an open flame, crispy, caramelized bits melting in your mouth with each delectable bite. During the warm months, grill-time means back-yard party time. When winter hits, though, it’s a game of drawing straws to see who’ll get stuck outside on grill duty.

If it’s chilly and I want my steak fix without sacrificing my fingers to frostbite, I pull out my recipe for Steak Pizzaiola. It’s a classic Italian dish, straight out of Naples, that brings all the toppings of a good pizza – onions, mushrooms, peppers, and a flavorful tomato sauce – to the top of your favorite cut of beef, pan-seared to perfection. My version is a quick stove-to-table recipe, plus it begs for a side of pasta, so it’s the kind of dish that actually makes me grateful it’s cold outside!

If you’re a fan of the series, you may have heard about this dish on the steak pizzaiola Everybody Loves Raymond episode, pitting mother-in-law against daughter-in-law in an epic Iron-Chef-esque battle. I suspect it’s one of those recipes that’s in the wheelhouse of every Italian chef and home cook, and it’s definitely one my family loves to hear is on the menu for the week.

Steak Pizzaiola is all about the pizzaiola, a pizza-reminiscent sauce that can be used to cover steak or just about any other meat. Instead of steak pizzaiola Mario Batali makes a version with veal chops, and Giada de Laurentiis makes one with hamburgers. There are also recipes that use a firm white fish like haddock or cod.

Steak versions cover the range of beef cuts, from inexpensive, tougher cuts to expensive tenderloins. Steak pizzaiola slow cooker versions use London broil or chuck roasts that need awhile to tenderize (these cuts also work well in a steak pizzaiola recipe oven style). The Rachael Ray steak pizzaiola, on the other hand, uses a porterhouse or ribeye that cooks on the stovetop much more quickly than the other cooking methods.

I’m all about quick-cooking, so my Steak Pizzaiola uses a strip steak that gets seared in the pan and lends all those tasty, beefy bits to the sauce. Strip steak (also called a shell steak if the bone is intact) comes from the loin, so it’s already tender and doesn’t take much time to cook. This whole amazing dish will be ready in about 30 minutes!

Sauce ingredients vary just like the protein choice, often capitalizing on the pizza theme by adding mushrooms, anchovies, and even bite-sized pieces of pepperoni. The common ground, though, is a foundation of garlic, peppers, tomatoes, and Italian herbs.

Steak Pizzaiola Recipe

My pizzaiola has a generous amount of garlic – you’ll definitely be keeping the vampires at bay with this one! Peppers are another required ingredient, and they’re often a key player (the steak pizzaiola Lidia Bastianich makes uses two whole peppers).

While I like the subtle flavor of bell peppers, I decided to shake things up a bit in my recipe by using roasted red peppers. They add a touch of sweetness to the dish, which balances the acidity of the tomatoes since the sauce doesn’t cook long, plus they’re already soft which saves a little cook time (a win win!).

Instead of just using canned tomatoes, I add chewy bits of sundried tomatoes to the mix. They lend additional sweetness and an intense tomato flavor, as well as a little texture and subtle smokiness. The sundried tomatoes also play really well with another unique ingredient in my sauce: balsamic vinegar.

Many recipes use wine here to add some acidity and deglaze the pan after cooking the aromatics and veggies. Balsamic vinegar, which, unlike red wine vinegar, is actually made from red grapes that haven’t been fermented, is a delicious, concentrated elixir that adds such a wonderful depth to this sauce. The acidity is more subtle than vinegar and the complex flavors make the sauce taste like it was simmered all day.

Italian seasoning? It’s one of my favorite multi-purpose blends to use around the kitchen, and it adds all the classic aromas you’d expect in Italian “gravy.” I like to boost the flavors a bit, though, with some fresh basil right before serving. It’s a bright, citrusy/licorice-y flavor that really works in the sauce and as a great complement to the steak. The color’s also a lovely contrast when you plate this dish.

I know some home cooks love to top their steak pizzaiola with cheese, but I usually skip this step since the dish is super flavorful on its own. Feel free to sprinkle a little grated Parmesan or mozzarella on top, though, if you just can’t help yourself. You’ll create an awesome low-carb alternative to pizza!

I like to serve Steak Pizzaiola with pasta, of course, because it’s a great way to keep from wasting those saucy bits on your plate. Polenta or gnocchi are good options too, and you’ll want some crusty bread and a bottle of red handy since no Italian meal is complete without it.

By the way, if you have any leftover sauce, don’t throw it away. It’s a great topping for poached or fried eggs if you’re having a brunch get-together or for repurposing leftover chicken or pork. Try warming the sauce with leftover pot roast shreds, then adding that to some hoagie rolls with sliced pepperoncini’s for some serious Italian sandwiches.

Steak Pizzaiola Recipe

Recipe Notes:

Serious about searing – Make sure you use an oil with a high smoke point in this recipe to ensure a quality sear. I recommend either vegetable oil or canola so your oiled pan gets really hot before actually smoking. Definitely don’t crowd the pan, either, since too much steak will drop the temperature of the skillet significantly and leave you with sad, grey meat. I only add 2 steaks at a time to my 12-inch skillet.

Size matters – It may be tempting to add a few extra ingredients to the sauce here, like more mushrooms or extra tomatoes. The sauce as-is fills up a 12-inch Lodge cast iron skillet almost ¾ of the way with enough room to handle the displacement from the steaks. You’ll need an extra-large pan to keep any extras from making the sauce spill over the sides.

Bruised basil – Basil oxidizes just like apples do, and bruising (which is essentially what you’re doing when you chop it) speeds up that process. For this reason, I usually chop mine right before I’m getting ready to serve this dish. There are a few tips, though, to keep it greener awhile longer.

Make sure your knife is sharp, and try using a technique call “chiffonade.” Stack the leaves on top of each other, roll them tightly into a long tube, then cut thin strips across the short side. You can put these shreds into a bowl and cover them with a damp paper towel for a few hours.

Another trick is to spray or brush your knife with a little oil before chopping. This essentially covers the cut edges of the basil with a little oil to slow down the oxidizing process.

Source: Adapted from


The post Steak Pizzaiola Recipe appeared first on Gonna Want Seconds.

Creole Sauce

$
0
0

Jazz up dinner time with this authentic Creole Sauce recipe. Simple ingredients create a complex sauce guaranteed to start a Louisiana fete at your dining table!

Each state has its own “origin” dish, the one sweet or savory treat considered its culinary claim to fame. In Alabama? Fried green tomatoes. Maine? The lobster roll. Ohio? Buckeye balls.

Only one state, though, has constructed an entire, world-renowned cuisine, one inspired by the French but built on ingredients and seasonings and dishes that are uniquely theirs. This Creole Sauce is one little piece of the puzzle that is the amazing food of Louisiana.

When you step onto the streets in New Orleans, you know you’re somewhere special. Everywhere you turn there’s a party for your senses . . . vibrant music, a rich, colorful culture, and enticing aromas wafting out of eateries tucked into every corner of the city. From open-air cafes with hot beignets and coffee to five-star restaurants with white table cloths and oysters Pontchartrain, it’s impossible to discover all the complex textures and flavors of this foodie mecca (though I’m more than happy to die trying!).

Creole cuisine, created by French colonists in New Orleans, had the benefit of the melting pot of people in the giant port city, so ingredients from all across the world helped shape the food. Compared to Cajun cuisine, which is rooted in the inspired “country-style” food of refugees from Acadia (part of Canada), Creole cooking contains more expensive, (originally) imported goods from Europe, the Caribbean, and even Africa. Ingredients like butter, okra, tomatoes, and exotic spices molded the Creole “city food” you find in Louisiana today.

This Creole tomato Sauce combines the seasoning pillars of the region into a versatile sauce that can be used to Creole-ify just about anything. It has all the basic items you’d find to start off a great gumbo, etouffee, or jambalaya but in a great topping for other dishes like seafood – a creole sauce for fish or the famous shrimp creole sauce. You can also use Creole Sauce for chicken or serve it with grits and grillades (pan fried pork or steak medallions).

Okay. I’ll stop gushing over Louisiana’s amazing food. Let’s talk about the sauce!

Some tender palettes are undoubtedly scared of the fiery fumes associated with food from this part of the country, so I suspect you’re wondering, “Is creole sauce spicy?” The truth is Creole and Cajun dishes often unfairly get relegated to “it’ll-set-your-face-on-fire” food status. While some of the dishes do carry a punch, most authentic dishes do not, and this particular one just has a hint of Tabasco sauce.

(If you’re looking for a spicy creole sauce recipe, you should explore Caribbean creole sauce that uses scotch bonnet or habanero peppers instead of Tabasco.)

The first part of this sauce is the seasoning mix, and it’s so flavorful you’ll want to keep extra on hand to season other dishes. These herbs and spices are classics in regional recipes – bay leaves, thyme, oregano, and basil. Sweet paprika adds a touch of heat, along with both black and white pepper.

White pepper isn’t necessarily something you have in your pantry, but I highly recommend making the purchase. It’s commonly used in Asian cuisine as well as in cream sauces where you want to preserve the white color.

White pepper is made from fully ripened peppercorns (black are plucked before they’re ripe) that are skinned and fermented. The result is a more complex, really earthy flavor that’s not quite as hot as its black counterpart. We’re really trying to build a spice blend that hits all the different parts of your palette, here!

The cooking starts with butter, the fat of choice in Creole dishes (even roux), and it helps to soften the aromatic holy trinity: onions, bell peppers, and celery. This combo is also called the Cajun/Creole mirepoix, putting their own spin on the traditional French version of onions, carrots, and celery. Garlic is practically an honorary member of this trio.

Creole Sauce Recipe

Fresh tomatoes get incorporated too which creates a lovely texture and adds a brightness from the natural acidity of these perky fruits. Some recipes use canned tomatoes, but fresh are a little more subtle in flavor which lets the other flavors shine through. We’ll add some tomato sauce near the end of the cooking process to impart more of the traditional velvety tomato sauce mouth feel.

I’m pretty sure Tabasco is served with every meal in New Orleans, even dessert, and we’ll want to add just a touch in this recipe. The sauce was born and bred in Louisiana, and it’s a vinegar based pepper concoction, made from copyrighted Tabasco peppers, that carries a good punch but not so in-your-face you can’t handle a dash or two.

This simple but complex sauce only takes about 30 minutes to make, and it’s a perfect thing to double or triple and freeze. Just thaw, reheat, and pour on top of roasted chicken, grilled pork chops, or pan-fried shrimp. The shrimp can even cook directly in the sauce to minimize clean-up after your amazing meal.

Creole Sauce dishes are traditionally served with steamed rice and a crispy loaf of French bread. Queue the zydeco music and mix up some rum-based beverage, and you’ll be ready to serve up a little Louisiana magic.

Recipe Notes:

Stock stuff – I use chicken stock in this recipe since it has a pretty neutral flavor. If shrimp or fish is on the menu, though, I’d suggest substituting seafood stock.

Don’t throw away the shells, bones, or tails (or heads) if you’re cleaning shrimp or fish at home. Just rinse and add those bits to a stock pot with water and the usual aromatics (things like celery, onions, peppercorns, bay leaves). Unlike stocks made with chicken or beef, seafood stock will be ready to go in only an hour.

Freeze some to keep on hand for any seafood soup or stew!

Decadent stuff – If you want to up your game a bit, you can turn this into a creamy Creole Sauce recipe. Once your sauce is finished, reduce the heat to low and add about ½ cup – ¾ cup of heavy whipping cream, keeping the sauce at a very low simmer until just thickened slightly.

This version will work with any of the dishes you’d use the basic Creole Sauce for. I’d just recommend using pasta instead of rice to carry all that rich sauce directly into your mouth!

More Sauce Recipes!

Tzatziki Sauce Thick, rich and creamy flavored with garlic, lemon and dill.


Horse radish Sauce RecipeComplements everything from beef and pork to veggies and fries with its signature face-tingling flavor.

The post Creole Sauce appeared first on Gonna Want Seconds.

Beef Chow Mein

$
0
0

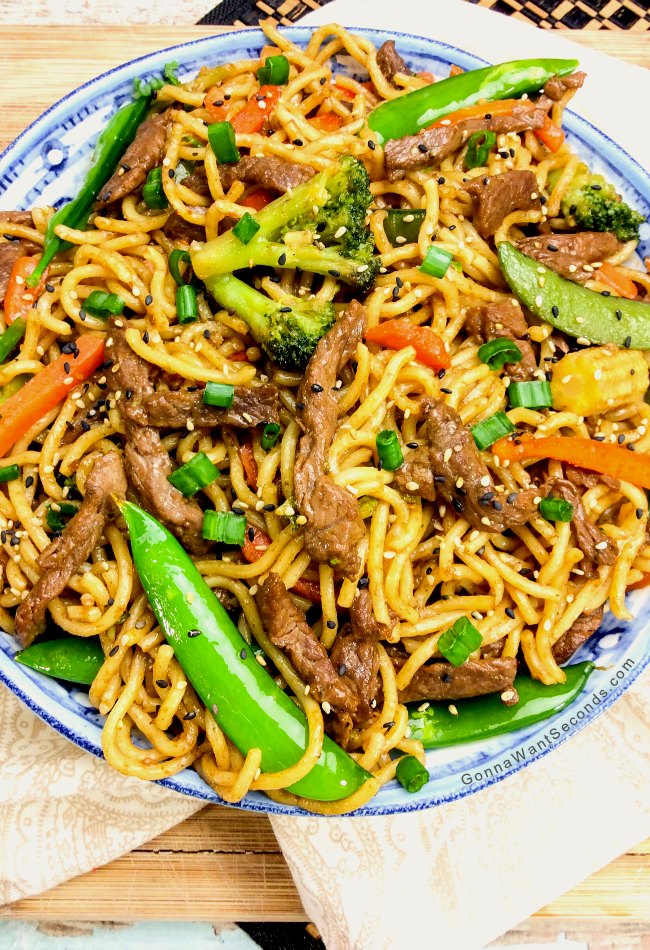
Put down that to-go menu and hop in the kitchen to put together this simple Beef Chow Mein. Crisp veggies, tender beef, and eggy noodles are tossed in a Chinese-inspired sauce that will have your family looking around the kitchen for those little takeout boxes.

Beef Chow Mein Recipe

Anyone else think noodles should be an official food group? Chewy udon, tender tagliatelle, delicate spaetzli . . . this class of soft, doughy delights is just as essential as any of the other groups, right?!

Italians aren’t the only ones who have noodles down to a science. Asian cuisine does too, and all that textural magic makes this one killer dish. It’s time for some ​Beef Chow Mein fun!

I’ll show you how to make Beef Chow Mein like takeaway (or takeout, as we say in other parts of the world) that’s easy peasy and captures all the textures and seasonings of your favorite Chinese noodle dish.  A three-ingredient marinade, some boiling water (for softening the noodles), and a simple sauce is all you need to pull off Beef Chow Mein Chinese style. There’s not even much chopping since you’ll use a little help from frozen vegetables, already perfectly sized and seasoned for the recipe.

According to the Beef Chow Mein wiki, there are lots of variations to this dish (though we don’t need the wiki to tell us that). Some have lots of gravy served over crispy noodles, some use big chunks of steak, and some even use cream of mushroom soup. This is a pretty authentic version, with just enough sauce to dress the ingredients, thin, tender pieces of beef, and traditional Chinese flavors and ingredients. Not a can of soup in sight!

Flank steak is my favorite for this – and any other – stir-fry because it’s lean (which helps with the Beef Chow Mein calories), has tons of beefy flavor, and cooks in about a minute if it’s sliced nice and thin. If you don’t have a butcher who can do that for you (do people actually have butchers??), freeze your flank steak for about 15 minutes and it’ll be much easier to cut stir-fry-sized pieces.

The marinade’s stupid simple – just soy sauce, rice vinegar, and a little cornstarch.  Both the soy and the rice wine bring their own salty/acidic qualities to the marinade, and the corn starch actually coats the meat a bit to help seal in those flavors. It’ll also help thicken the sauce a bit when everything comes together at the end.

Make sure you take the time to cook the flank steak in stages. Too much too fast and the temperature of your skillet will drop. Then the meat juices will start to collect in the pan and you’ll be boiling your steak. Boiled meat means major toughness and the end of a perfect bowl of Beef Chow Mein.

The “mein” (Chinese for “noodles”) in this dish are wheat and egg noodles, also called wonton noodles. You’ve likely seen both “lo mein” and “chow mein” on Chinese menus, and both use egg-based noodles, but lo mein can be flat or round and chow mein is almost always round. Both can be served soft, but chow mein is sometimes crispy with the stir-fry resting on top of a crunchy nest of noodles.

Beef Chow Mein Recipe

I’m using a soft version in this recipe. Be sure not to overcook them, and don’t skip the rinsing step. The cool water will stop cooking the process (hooray for not soggy noodles) and eliminate any extra starch left on them that might thicken up the sauce too much.

This is one of those recipes that I use a little convenience item for: frozen vegetables. Several companies make a seasoned Asian mix that has all the veggies you’d want in a stir-fry, things like broccoli, carrots, sugar snap or snow peas, and those cute baby corn. You can buy the specialty ingredients separately, but I always end up having leftovers, so this is a perfect way to be sure I have exactly the amount I need.

Some home chefs prefer a beef chow mein recipe with cabbage, but I think the shredded texture and size really competes with the noodles. Cabbage also has a distinct flavor that I just don’t like in this particular dish, so I just hold onto mine for some future slaw and leave it out of my version.

The sauce in my Beef Chow Mein is really where most of the flavor’s at. There are only a handful of ingredients, but they all pack a powerful punch. There are three in particular that form a tasty triad of chow mein goodness. First is soy sauce, known for the salty, umami flavor it brings.

Next on the list is oyster sauce which is actually made from oysters, the briny essence of those mollusks you either love or hate, concentrated, then mixed with a little salt and sugar. This ingredient is an essential part of Chinese cuisine and adds an earthy depth to the sauce. Although it’s used a lot in noodle stir-frys, it’s a special ingredient not everyone thinks to use (the beef chow mein recipe Food Network stars Ree Drummond and Giada de Laurentiis use skip it).

The third ingredient is hoisin, a thick, sweet Chinese BBQ sauce flavored with five-spice powder that’s often dabbed onto those beautiful steamed buns (or bao) along with some fresh BBQ pork. It practically melts into the sauce here, complementing the beef and the noodles as well. We’ll round out the sauce with a little brown sugar and vinegar to create that perfect savory and sweet balance.

Everything, including the noodles, gets stir-fried a couple of minutes in the wok, and it’s ready to go. I like to garnish the top with some sesame seeds, toasted if you have time. Some green onions, sliced thinly on the bias, are also great sprinkled on top, both for color and a fresh, spicy crunch.

This is such a convincing version of Chinese takeout your guests will be asking for their complementary fortune cookie!

Recipe Notes:

Other types of beef – Flank should be easy to get your hands on for this recipe, but sliced sirloin will work too. You can also make a ground Beef Chow Mein, though it’s definitely a little harder to eat with your chopsticks!

Frozen veggies – If you can’t find the frozen Asian medley, you can substitute another veggie mix that has broccoli in it. If you want to substitute fresh veggies, you’ll need about 3 ½ cups of your favorite combination. Broccoli, bell peppers, yellow squash, sliced shiitake mushrooms . . . you just may need to stir-fry them a little longer to reach the crisp-tender stage since frozen veggies are often blanched before freezing.

No noodles – Regular pasta can be used instead of the Chinese egg noodles in a pinch. Spaghetti is probably the closest in size, and you can try this little trick using baking soda to add a little more spring to the noodles so they’ll mimic the Chinese variety.

The post Beef Chow Mein appeared first on Gonna Want Seconds.

Red Velvet Oreo Brownies

$
0
0

It’s perfect for bake sales or just for an after-dinner treat!

Red Velvet Oreo Brownies

Looking for a fun alternative to red velvet cake? Try this red velvet Oreo truffle! It’s super easy to make – you’ll use red velvet cake mix (I like Duncan Hines) and Oreos, with a few other simple ingredients.

My recipe for red velvet Oreo truffle brownies calls for holiday Oreos. You know the cookies I’m talking about – Oreos come in pastel colors in spring, and reds and greens around the holidays. You’ll even find orange Oreos around Halloween.

You can certainly use the classic black and white, but I love the fun color that the holiday Oreos add to the dessert.

You can use this Oreo truffle brownies recipe for just about any occasion.

Cut your dessert into bars to sell at the bake sale, or just serve it to your family after supper. But keep in mind that a little bit of planning ahead will be required.

Make sure before you begin that you’ve got an hour or so to set aside. Better still, prepare your red velvet brownies the night before. The chocolate ganache will take a few minutes to make.

But, more importantly, it’s going to take some time to set in the refrigerator. If you don’t allow it to set, your recipe will turn out soupy. In other words, a chocolate disaster!

Don’t be scared to play around with the ganache, either! I’ve experimented with it myself, and have made red velvet Oreo cheesecake bars as well as a red velvet Oreo truffle cake. (I just added an egg.)

I also came up with a cookies and cream red velvet brownies recipe – instead of using chocolate chips in the ganache, try white chocolate chips!

Before you experiment too much, though, try my red velvet chocolate brownies recipe.

I know you’ll find that it’s simple to make, turns out perfectly every time, and you won’t find a soul who doesn’t love it. Enjoy!

Red Velvet Oreo Brownies

Recipe Notes:

Parchment Paper – In my recipe, I suggest that you grease your pan. However, if you’ve got parchment paper available, use that instead! Parchment paper is a no-fail way to keep any brownies from sticking. Your brownies will be easy to cut and will slide out of your pan with no problem.

Before you crack your eggs – It’s best to use room temperature eggs in these red velvet chocolate chip brownies. Cold eggs won’t mix properly with your other ingredients, and they can change the texture of the brownies once they’re finished. Let your eggs sit out on the counter for an hour or so before you crack them.

Check your brownies – The bake time I listed in my recipe was exact – for me. Depending on your elevation and your oven, your bake time may vary. Don’t stalk your brownies – opening the oven door every five minutes won’t help. But do check them a few minutes before your timer goes off to prevent overbaking. For the best results, don’t bake them in a glass pan. Instead, use a dark metal pan, or even silicone works well.


The post Red Velvet Oreo Brownies appeared first on Gonna Want Seconds.

Honey Glazed Salmon

$
0
0

Save your boring weeknight dinner with this heavenly Honey Glazed Salmon, artfully crafted to tickle ALL your taste buds!

Easy Honey Glazed Salmon

Balancing flavors isn’t just a passion, it’s a lifestyle for me, and I can’t think of any recipe that manages to do that as beautifully as this Honey Glazed Salmon. It’s savory and sweet, bright and earthy, with just a touch of heat.

Texturally, there’s tender salmon, a sticky glaze, and little hints of nutty, crunchy sesame seeds. It’s really the perfect dish to showcase all the culinary voodoo I do in my kitchen, and I can’t wait for you to try it!

Salmon is the second most-consumed seafood in the U.S. (behind shrimp), and I even see it on menus at steak restaurants. Its popularity is likely due to its mild, yet rich flavor, plus its nutrients and healthy fats. The benefits are so good that you really smart scientist types literally recommend consuming it (or some other fish) twice a week.

Choosing fish can be a daunting task, especially if you live hundreds of miles from the coast, but I always recommend chatting with someone at your fish market for information. The freshest choice can actually be a frozen filet, for example, since those may have been iced right after catching instead of aging a few days in the truck on the way to your market.

There’s also some discussion (or heated argument) over choosing farm-raised vs. wild-caught salmon. The only wild-caught salmon in the U.S. is from the Pacific, so anything from the Atlantic is farm-raised. There are plenty of responsible farmers out there, though, so it’s really best to talk to someone who knows their fish.

We’ll cook the salmon in a little olive oil, seasoned very simply with a bit of salt and pepper, just until the filets are browned and a have a slightly crispy exterior. Overcooked salmon, or any fish, for that matter, is a travesty since you’ve usually spent a bit of the old cashola to serve it in the first place.

I prefer salmon just barely cooked through, soft, almost creamy on the inside, since it really enhances the richness of this particular fish.

If you want to double-check the temperature for safety, make sure your instant-read thermometer reaches 145 degrees in the thickest part of the filet.

Although I’m partial to my own, there are a few other versions of this honey soy glazed salmon recipe that are worth mentioning. Most are a twist on the classic salty/sweet teriyaki glaze for salmon that includes both mirin and ginger (both of which are missing in my version).

There’s a honey brown sugar glazed salmon, but I find that’s a little too sweet to work in that delicate balance of flavor I’m after, so I just use a touch of honey. I complement the honey with fresh squeezed lime juice and a generous dollop of Dijon mustard. Dijon, which is made by processing mustard seeds with white wine instead of just vinegar, is more subtle than its yellow, ballpark sibling, and adds just a touch of heat and a creamy quality to the glaze.

Easy Honey Glazed Salmon

Rather than a simple honey mustard glazed salmon, though, I also include soy sauce, since it brings a wonderful umami quality to the glaze. It’s also a simple way to enhance the natural flavors of the other ingredients in a more complex way than just using salt.

Some recipes incorporate everyone’s favorite aromatic – honey garlic glazed salmon and honey garlic soy sauce salmon. As much as I love garlic paired with honey in dishes like my Honey Garlic Chicken, it competes a bit with the other flavors in this dish, especially the delicate fish, so I skip it in my version of this recipe.

The absolute best thing about this sauce is that’s it’s so simple to put together! You’ll just have to dump everything into a sauce pan on the stove and cook it a minute or two so the cornstarch can do its thing and help the sauce reach glazing consistency. Because we cook it in the same pan as the salmon, you’ll have the little salty, fishy bits incorporated into it too.

A little dip in the glaze is all it takes to coat the filets with this perfect balancing act of a sauce. Finish the dish by sprinkling the top with a few sesame seeds (toasted, if you can) and a little parsley for color. Some finely chopped scallions (the green part) or chives would work too if you don’t have any parsley on hand.

I like to serve this Honey Glazed Salmon with steamed rice, since there’s usually a little extra sauce to drizzle on top, and some baby bok choy or broccoli.

In addition to being perfectly crafted from a flavor standpoint, this is also my favorite kind of dish because it’s both quick enough to pull together for a weeknight family meal and elegant enough to serve to company.

This Honey Glazed Salmon is the stuff dinner dreams are made of, and it’ll make you put fish on the menu a little more often.

Recipe Notes:

Salmon choices – If you don’t have the luxury of a knowledgeable fish monger, there are still some tips you can follow to make sure you’re getting the best salmon available. King is literally the “king” of the salmon world, which the price reflects, but it’s really rich and buttery. Sockeye is the other popular choice, and a good fatty option.

Definitely always look for filets that are free of blemishes (no brown spots in the flesh) and moist (no dried out skin either). If all else fails, use the best tool you have: your nose. Fresh (or fresh-frozen) fish should actually not smell fishy.

Other cooking options – Although I don’t recommend cooking this Honey Glazed Salmon in foil, since it tends to dilute the sauce with fish juices and steam, you can do a baked Honey Glazed Salmon version.

Place the filets on a foil-lined baking pan and drizzle with a little olive oil, then season with salt and pepper. Bake these in a 425 degree oven for about 12 – 15 minutes, depending on the thickness of the filets. You’ll still want to heat the sauce on the stovetop to thicken, then gently glaze the salmon with it before serving.

You can also use a similar method and make a grilled Honey Glazed Salmon, cooking it over medium-high for 10 – 15 minutes based on how thick it is, then topping it with the sauce you’ve prepped on the stove.

The post Honey Glazed Salmon appeared first on Gonna Want Seconds.


Buffalo Chicken Lasagna

$
0
0

Get ready to surprise your Super Bowl Party guests with this rich, decadent twist on the classic Buffalo chicken wing. Forks required!

Easy Buffalo Chicken Lasagna

You know how sometimes you’re sitting in a restaurant, licking the spicy stuff off your fingers after consuming a big basket of chicken wings, when you start wishing you had a side of obscenely cheesy pasta? No? Stay with me here . . .

Imagine those juicy bits of chicken, coated in a Buffalo-inspired sauce, and nestled between tender lasagna noodles and thick layers of velvety cheese. See, now you’re thinking about Buffalo Chicken Lasagna too!

Buffalo wings, which get their name from the city that invented the cayenne-vinegar-butter sauced chicken pieces (no, this isn’t actual buffalo meat lasagna, LOL), have an addictive quality that’s inspired lots of different kinds of dishes. From Buffalo chicken pizza to jalapeno poppers, Buffalo Chicken Dip to pot pie, the combination of spicy chicken bits dipped in a creamy sauce is pretty hard to beat.

My recipe, inspired by the contest-winning buffalo chicken lasagna Taste of Home published, is the perfect combo of all the things that draws us to the wonderful world of wings. Making this easy Buffalo Chicken Lasagna means you’ll avoid the expense of going out and the mess of frying up some in your own kitchen but still get your fix for a good Buffalo chicken wing in a new and amazing way.

Lasagnas always start with a flavor-packed sauce, and mine uses ground chicken, browned a bit with celery, onions, and garlic, along with a little carrot for a touch of sweetness. This creates a really wonderful, aromatic base and some texture to make this sauce nice and chunky. Rather than a traditional tomato-heavy component, I use just a few canned tomatoes with the much-anticipated hot sauce!

There are obviously lots of options when it comes to liquid heat, but I’m a fan of Franks Red Hot Buffalo Chicken Lasagna. It has a good amount of heat, but without being overpowering. Of course, this is a “Buffalo Style” recipe and is definitely on the spicy side, so if you’re making this for kiddos or other sensitive palates, cut back on the Frank’s.

I realize spiciness is a subjective thing, but I’d say this recipe is mildly spicy, not make-your-eyes-water spicy. By all means, serve the bottle on the table for those who need to feel the burn.

The next component is the cheese filling, and this one is so rich and creamy! As with any lasagna, you can go one of two routes here: with béchamel (like the Rachael Ray buffalo chicken lasagna-style casserole with potatoes) or without béchamel (and enough cheese to make up the difference!).

My recipe is safely in the cheese overload camp with four, yes THREE, types of cheese: ricotta and mozzarella, which are the classics, but I also use tangy blue cheese crumbles.

Easy Buffalo Chicken Lasagna

This cheese combo makes this extra rich, and it’s such a wonderful balance to the spicy, slightly acidic sauce. If you want to make this a little more healthy, you can always substitute whole wheat noodles like the buffalo chicken lasagna Weight Watchers recipe, but I don’t recommend using low-fat cheese here. It’s worth the calories, and it’s not like you’re eating this every day (though I promise it will be tempting!).

I use a decent amount of blue cheese in my recipe too since (1) I love it and (2) you need a good amount to stand out among the other flavors in this dish. The buffalo chicken lasagna Pampered Chef version only has the sprinkles on top, but I really think adding more inside the cheese filling means you’ll definitely be tasting it in every bite.

Make sure you get a variety that crumbles too, not one of the extra creamy varieties that won’t incorporate as well.

All this gets layered into a baking dish, just like a classic lasagna would, the only difference being reserving a bit of blue cheese to add right after it comes out of the oven.

Although I occasionally like stuffing individual noodles in dishes like Cannelloni, I prefer making this dish in a casserole rather than Buffalo Chicken Lasagna roll ups. There’s a careful balance going on between the Buffalo-style sauce, noodles, and cheesy goodness that gets lost a little when you start making individual rolls (my way also makes this buffalo chicken lasagna easy and less time consuming).

Bake ‘til bubbly and beautiful and ready for that extra blue, and you’re all set. This is definitely a decadent, heavy dish, so I always like to have a little salad on the side (even if I only have room to pick at it after indulging in the lasagna). Like most baked pasta dishes, I definitely think this one’s better the next day, and it’ll freeze well too. Try this recipe the next time you’re craving Buffalo wings and see if you’ll ever be satisfied with that boring old basket again!

Recipe Notes:

Chicken – If you prefer the texture of shredded chicken, you can definitely substitute it in this dish. Leftovers or a store-bought rotisserie chicken will work great, or you can certainly bake or boil your own. You’ll just need about 4 cups to use in the recipe.

Gorgonzola or Stilton – Different qualities and brands of blue cheese have different characteristics. I use a fairly mild, moderately priced blue cheese in this recipe, something like a Danish Blue or Gorgonzola. If you’re using a particularly strong variety, I would suggest reducing the amount of blue cheese. You can always sprinkle more on top if it doesn’t quite have the blue cheese “oomph” you’re looking for.

Slow-cooker savvy – Want to avoid turning on your oven and save a little prep time? You can easily assemble this in your slow cooker for a Buffalo Chicken Lasagna crockpot version.  Since the cooking time’s significantly longer, you can also use uncooked noodles (or no-bake noodles like I do in my classic Crockpot Lasagna). Make your sauce, then layer everything into a lightly-greased slow-cooker and bake on low 4 – 5 hours. (You’ll still want to reserve half the blue cheese to add on top at the end.)

Easy Buffalo Chicken Lasagna

The post Buffalo Chicken Lasagna appeared first on Gonna Want Seconds.

Caldo de Pollo

$
0
0

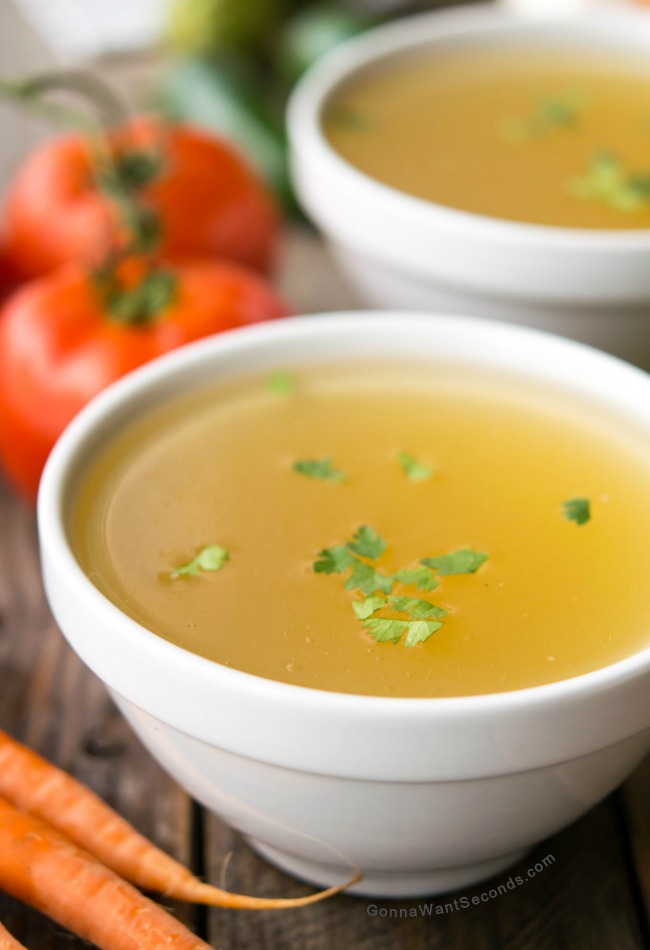
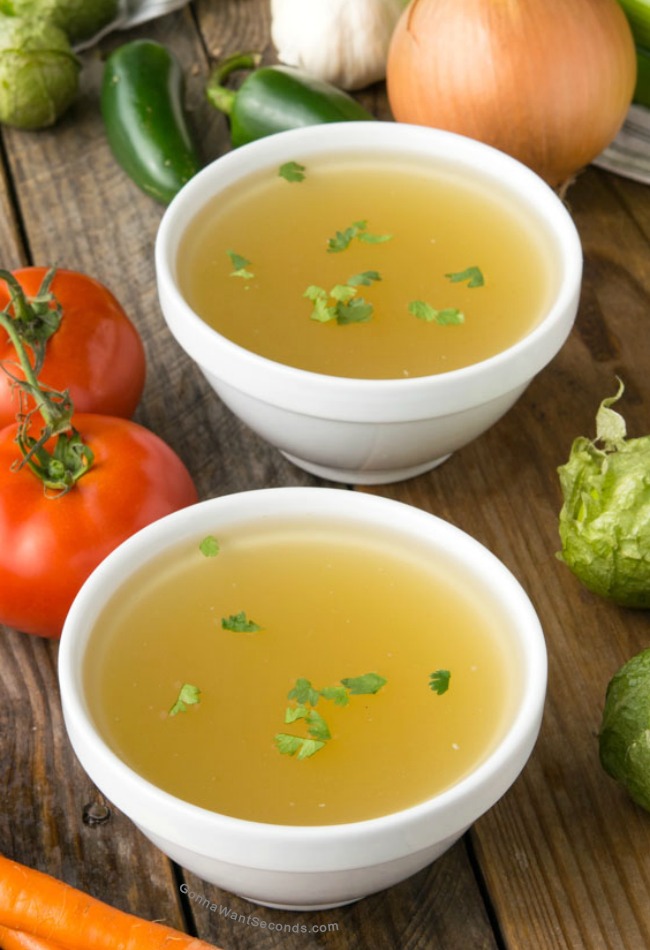
Add some Latin flair to the classic chicken stock and create a wonderful, game-changing flavor base for all your Mexican-inspired cooking!

Authentic Homemade Latin American Chicken Broth

There’s a reason they say chicken soup is good for the soul, or a cold, or a gaggle of whining, hungry kiddos. The humble chicken, slowly simmered with just a few ingredients, can transform water into liquid gold so satisfying it’s like a salve for your insides.  If there’s a pot of Caldo de Pollo near me, I’m probably smiling inside and out!

The Caldo de Pollo translation is literally “broth of chicken,” so Caldo de Pollo in English basically means chicken stock with a Mexican twist. Wondering how to make Caldo de Pollo (or como hacer caldo de pollo if you want to practice your Spanish)? Well, here’s my Caldo de Pollo receta (or “recipe”).

Just a few changes in technique to classic chicken stock prep, plus a few special additions to your chicken pot, and you’ll have a little nectar of the gods on your hands in just a few hours.

The Caldo de Pollo ingredients start with chicken, of course, and I always use a whole chicken for this recipe. Chicken breasts makes a clean, strong-flavored stock but without much body; dark meat adds body, but the flavors aren’t as concentrated and the stock itself can be a little muddy. Combining the two gets you the best of both worlds.

If you don’t have a pot that’s tall enough to hold a whole chicken, you can use one that’s been cut up. I recommend doing this at home, though, rather than buying a pre-cut one, so you can reserve the backbone and other bony bits the butcher might have pitched.

Using bone-in pieces is essential since they add lots of extra flavor and release collagen that enriches this, or any other, stock. Bones will make traditional stock set up like jello once it’s been chilled a bit, and it’s definitely what separates a great homemade version from the stuff you buy in cans.

That being said, Caldo de Pollo is a little less rich than traditional stock. For a regular chicken stock, I often use roasted chicken, then nestle the pieces into a slow-sweated blend of aromatics, and cook it for days (or at least half of one). For this recipe, we’ll change the technique a bit to ensure a better balance of all the flavors.

First, we’ll only cook this a couple of hours, just until the chicken’s done and there’s no trace of pink near the joints in the backbone. You’ll still extract some of the gelatin and flavor from the bones, but your chicken won’t be completely falling apart.

Authentic Homemade Latin American Chicken Broth

We’ll also NOT be sautéing the aromatics. I almost always cook onions and celery first in all my recipes, mainly because the direct contact with oil and heat helps break down the ingredients to release maximum flavor. In this case, I deliberately opt for a more subtle veggie essence, which has the added bonus of less chopping!

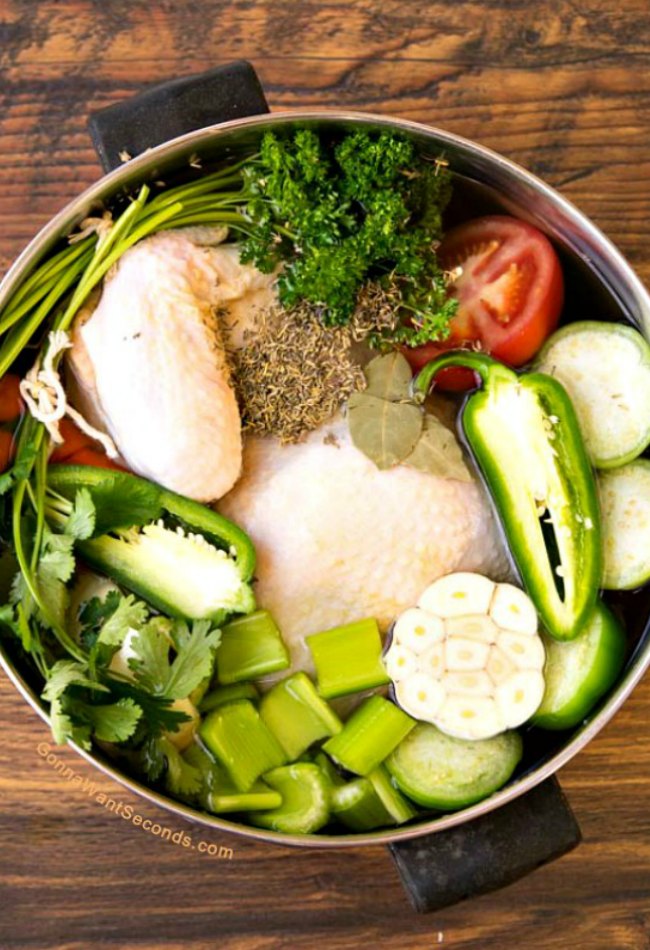
The Caldo de Pollo seasoning includes some old standbys, but there are some unique Mexican items as well. Onions, carrots, celery, parsley? Check. But we’ll also use a whole head of garlic, plus two ingredients you almost never see in non-vegetable stock recipes: tomatoes and tomatillos.

Tomatillos are often used in Mexican cooking, generally in stews and salsas (like the salsa verde you may have enjoyed on your chicken enchiladas). They resemble green tomatoes in shape and color but have papery husks on the outside that make the skins underneath slightly sticky. Green tomatoes are generally cooked to mitigate some of the intense tart flavor, but tomatillos have a more subtle, fruity quality that, even raw, is used to complement rich Mexican dishes like carnitas or roasted pork.

Along with the (ripe) tomatoes, they add a lovely acidic, almost fresh, element to this stock. Caldo de pollo also includes mixed herbs, things like bay leaves, peppercorns, mint, thyme, and cilantro. Instead of mint, I use marjoram (a member of the mint family) in my version since I prefer the earthy notes of it to the brightness of the mint.

I’m sure some of the cilantro haters are already planning to omit that ingredient, but don’t skip it even if you’re not a big fan of it raw on top of your tacos. It mellows out a bit during the cooking and really helps impart an authentic Mexican flavor. (Also, don’t be scared of the solo jalapeno; after cooking, you’ll only notice a touch of heat.)

Once the liquid gold has cooled, you’ll remove all the big bits and use a fine mesh strainer to catch any remaining solids. Your Caldo de Pollo freezes beautifully for future recipes or will keep in the refrigerator for 3 – 4 days.

Need some ideas for incorporating this into your cooking? You can make an authentic Mexican soup by finishing off this Caldo de Pollo recipe with cabbage chunks, corn (on the cob), sliced zucchini, and shredded chicken, then topping each bowl with fresh avocado and cilantro (a little Mexican rice on the side is good too). Caldo de Pollo is also the perfect base for other soups like My Favorite Tortilla Soup, a great substitute for water in savory Mexican rice or beans, or a flavorful infusion for hearty, cheesy dishes like One Pan Burrito Bowls (if you don’t mind increasing the Caldo de Pollo calories, LOL!).

Caldo de Pollo is one of those core recipes you need to tuck into your recipe box so you can level up any Mexican-inspired dish.

Authentic Homemade Latin American Chicken Broth

Recipe Notes:

General Stock-Making Tips – Boiling is bad – simmering allows the fat and impurities to separate out rather than being incorporated into your beautiful stock. To help control the heat, you can even make a Caldo de Pollo slow cooker version. Just put everything into your crockpot and cook on low for 4 – 6 hours.

You also don’t want to stir the stock or keep pushing the veggies down into the pot. Otherwise, you run the risk of that dreaded emulsification, and we want all the bad stuff to either float to the top or sink to the bottom.

During the first 30 minutes or so of the cooking process, some of the proteins and fat will create a white-to-gray foam that rises to the surface. You’ll want to skim most of this off, again being careful not to disturb the stock too much. The foam can turn a nice clear stock into a cloudy one, and it can actually turn bitter the longer it sits.

I suggest rinsing the chicken thoroughly to help reduce the amount of foam, but definitely try these tips for effective skimming.

More Mexican Inspired Dishes!

Mexican Cream Cheese Crock Pot Chicken– Good old fashion family style home cooking, perfect for a busy schedule!

Quick Mexican Chicken – Perfect midweek meal loaded with chunks of chicken, veggies and a mild yummy tomato sauce.

Beef Enchiladas -Tender, slow-cooked shredded beef and a sassy cheese combination wrapped up in a warm tortilla topped with generous helping of sour cream.

The post Caldo de Pollo appeared first on Gonna Want Seconds.

Blackened Chicken Recipe

$
0
0

From dull to dynamite – this Blackened Chicken recipe quickly turns a dinner-time staple into a de-lish de-light!

Regardless of what that song says, I think most of us feel like time is not on our side. Days are hurried, and getting a tasty, home-cooked meal on the table can feel like a real chore. I often like to (have to) use store-bought convenience items to make that chore a doable one, things like rotisserie chicken, bottled sauces and soups, and frozen veggies.

Sometimes, though, I find dishes that defy the odds – ones that use just a few pantry staples and can be made without a trip to the store. This Blackened Chicken is one of my best simple-yet-really-delicious recipes. Honestly, it’s hard to believe anything so easy to make tastes this good!

Chef Paul Prudhomme, the guru for all things Cajun and Creole, created this unique cooking process and began serving the infamous blackened redfish at his restaurant K-Pauls in 1980. It became such a popular dish Chef Paul had to limit the number of entrees each night, and the blackened fad swept restaurant kitchens across the country, even creating a shortage of redfish for a time.

The beauty of Chef Paul’s dish, though, is that it only requires a specific blend of spices and a little time in an iron skillet to produce something really extraordinary. We’re going to use the same cooking technique on an unassuming chicken breast, instead of the more expensive and less available redfish, and create something that will disappear off your dining table as quickly as it did out of Chef Paul’s kitchen.

The combination of spices in Blackened Chicken seasoning exemplifies New Orleans cuisine and all the influences around the world that helped to build it. You know there’s some heat, and we’ll use three different types of pepper – white, black, and red, each with their own fragrance and “heated” quality.

White and black pepper, originally from India, both come from the same round, dried berries but are processed differently to change the heat profile a bit (and the color). Red or cayenne pepper, originally from Guiana, comes from dried chili peppers with a more traditional chili shape and packs more of a punch for your taste buds. The three work together flawlessly in this dish to create a complex warmth that’s undeniably Cajun.

Paprika, a Mexican-born spice, adds another, milder heat with a subtle sweetness and, of course, a little color for our chicken. Thyme, the only herb in this mixture, brings a touch of France to this dish.

Now that we have a Blackened Chicken rub, let’s talk about how to make Blackened Chicken. The original method for blackening calls for coating the redfish with the spice mixture, then cooking it quickly in a cast iron skillet that’s been coated in butter. The magic happens there, where the spices meet the skillet, so it’s hard to reproduce that blackened crust using other cooking methods.

There are grilled blackened chicken recipe options, where chicken is dipped in butter, seasoned, then thrown on a hot grill. I love using the grill for lots of things, but this is too much of a fire hazard for me! Since we’re basically walking a thin line between blackened and burned here, I prefer the stovetop where I have more control over how hot the cooking surface is.

There are also blackened chicken oven baked options, but these typically are just roasted chicken recipes with a blackening-esque seasoning mix. You’ll definitely taste many of the flavors you’re supposed to in this dish using this method, but baked chicken really isn’t getting blackened without some quality time in a hot pan.

As an aside, I am using boneless chicken breasts here, not making blackened chicken thighs. Boneless white meat tends to be lean and tender (which also yields the most healthy blackened chicken recipe), so a quick searing technique like we’re employing here works well.

I find dark meat, though fattier, tends to be a little tougher and works best with a longer cooking time. Any lengthy cooking in this recipe and “blackening” will quickly become “burning.”

It’s that “burning” I’m also trying to avoid by using oil instead of butter. Unless you have clarified butter, you’re dealing with a lower smoke point than vegetable oil which means it’ll be easier to ruin dinner. Oil gives us a little safety net to help all the seasonings mingle with the chicken and caramelize without going past the point of no return.

Even though we’re not planning on any actual burning happening, I still suggest using an exhaust fan – there will definitely be some smoke.

That’s it! Chicken, spice blend, hot pan, and you have a delicious main course without even breaking a sweat!

I love to serve this with mashed potatoes or rice (with or without those Cajun red beans) since they’re the perfect starchy back drop for the flavorful chicken. Another simple home-style vegetable like Southern Style Green Beans or some cooling coleslaw would be welcomed company on your dinner plate. I’m just pretty sure you won’t believe how simply such a satisfying meal came together either!

Recipe Notes:

Thinner’s better – Remember how this all began with redfish? Well, redfish filets are pretty thin, so you’ll need thin chicken too to make this recipe work. The standard chicken breast is so thick that by the time you get it cooked, the blackening spices will burn and that’s a whole different kinda blackening no one will enjoy.

Either pound your chicken breasts thin, butterfly them, or purchase thin-sliced ones. I like to place them between two pieces of plastic wrap and go at them with a rolling pin until they’re about ½” thick.

Spicy – If you don’t like things too spicy you can alter the heat by reducing the cayenne (or even add more if you like feeling the burn). Blackened Chicken is a perfect base to serve with our delicious Creole Sauce too, which has some bite as well. If you try them together, you might need to adjust your spice accordingly or at least serve a big pitcher of ice water on the table!

Leftovers – If you have leftovers or just want to slice the chicken up to make it go a little further, you can use these slices to make a blackened chicken Alfredo or other blackened chicken pasta, to fill tacos, or to make a blackened chicken salad. The flavors are strong, but not overpowering, and are pretty neutral, making it a good substitute in just about any dish that uses sliced or shredded chicken.

The post Blackened Chicken Recipe appeared first on Gonna Want Seconds.
Chicken Milanese Recipe

$
0
0

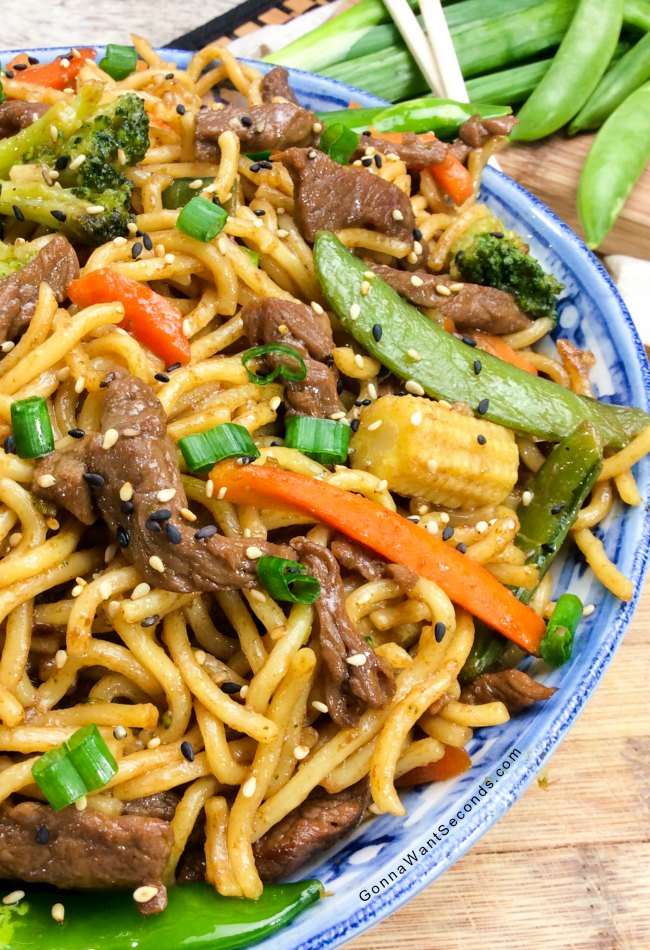
Chicken Milanese is one of the signature dishes of Milan Italy. Thin cutlets of chicken, breaded and cooked until crispy golden brown make Chicken Milanese a simple to make family favorite!

Chicken Milanese is one of the signature dishes of Milan Italy. Thin cutlets of chicken, breaded and cooked until crispy golden brown make Chicken Milanese a simple family favorite!

I’m all about simple, versatile, and crowd-pleasing when it comes to meal-making, and this Chicken Milanese has it all.

A thin piece of chicken gets cooked quickly – to crispy perfection, seasoned with a bit of nutty parmesan and Italian seasoning. It’s great gilded with sauce or served as-is with a little squeeze of lemon. Picky kiddos will think “chicken tenders” and adults will relish in the crunchy simplicity of a juicy main.

What is Chicken Milanese? Well, it means chicken Milan-style (as opposed to another Italian city), which is basically a chicken cutlet that’s dredged in a two- or three-step breading process, then pan-fried. It’s usually served au naturale with a simple salad, though roasted potatoes or a pasta side aren’t unheard of (this is an Italian dish, after all).

Fried cutlets aren’t anything new, nor are they the brainchild of one and only one country or area. The things that differentiate one from the other are the type of meat, breading, and the frying technique.

Although the meat choices include them all – beef, chicken, pork, and veal – they’re always sliced or pounded thin. This helps ensure a perfect crunch ratio in each bite. Ever nibbled all the crispy stuff off a piece of fried chicken, only to be left with sad, naked chicken (there’s actually a “Friends” episode that laments this exact dilemma)?

Thick, bone-in chicken is the perfect choice to oven-roast, grill, or use in a braised dish like Chicken Vesuvio, but in this recipe those thick pieces would leave too much meat without any breading and limit your ability to really get your crunch on.

Vienna’s famous schnitzel is a sibling to our Milanese Chicken (though some argue one was actually the parent of the other), but it’s generally made using veal (weiner schnitzel) and is often cooked in lard.

Milanese-style cutlets are usually pork and cooked in butter, olive oil, or some combination of the two (there’s also parmesan cheese in the breading).

Breadings can range from a light dusting of flour, like you’d use to make Chicken Scallopini, to a complex multi-step process. My recipe uses a simple, three-step series of flour, egg, and breadcrumbs to create a substantial crunch.

Even specific to Milanese cutlets, there are still some breading preferences, like skipping the flouring step. Eggs or an egg wash (made by diluting the eggs with water or milk) isn’t optional, though, since it’s quite literally the glue that holds this recipe together. I don’t thin my eggs at all because the thicker the eggs, the more glue there is to hold onto the breadcrumbs, which ultimately means a thicker crust.

Some recipes, like the chicken Milanese Pioneer Woman makes, use traditional store-bought breadcrumbs, while others, like the chicken Milanese Giada de Laurentiis makes, uses fresh bread crumbs. I like to use Japanese panko (“pan” meaning bread and “ko” meaning small pieces) to produce a really epic crunch.

Fun fact – authentic Japanese panko get their enviable texture from a loaf of bread cooked in a “shocking” way: with electrical current! The process was invented during WWII when the Japanese had limited fuel and wanted an alternative, heat-free way to make bread. No heat, no problem! When the dough’s ready to bake, it’s loaded into metal containers and shocked, creating a unique crustless loaf of bread.

Chicken Milanese is one of the signature dishes of Milan Italy. Thin cutlets of chicken, breaded and cooked until crispy golden brown make Chicken Milanese a simple family favorite!

If you’ve never worked with panko, they’re sliver-shaped, not round-ish like most breadcrumbs, and they don’t have any additional oil, both of which make the end product light and airy and ultimately less heavy than a smaller, denser crumb.

I like to cook the Chicken Milanese in a butter/olive oil combo to help increase the smoke point of the butter a bit (to prevent burning our covetable cutlets) while still retaining the butter flavor. You can only fit a couple of chicken breasts in your skillet at a time, so I recommend keeping the already cooked batch(es) in a low oven (around 225 – 250 degrees) so they’ll stay warm for serving. If you place them on a pan that’s been fitted with a cooling rack, they’ll stay extra crispy.

With Chicken Milanese sauce is optional. You don’t want something heavy like a cream sauce or else your crunchy cutlet will become a soggy sauce-carrier. Save the cream sauces for Chicken Florentine and stick with just a few tablespoons of a simple fresh tomato sauce or a quick lemon butter sauce with a splash of white wine.

You can also go the more traditional route and top this Chicken Milanese with arugula, dressed a bit with some olive oil, lemon juice, and a little salt and pepper. It makes a perfect lunch or light dinner.

Even as leftovers, you can use these cutlets to make chicken parmesan or a Chicken Milanese spaghetti, either served on top of the big pile of pasta or on the side (like the chicken Milanese Jamie Oliver makes). A few curls of freshly grated parmesan will top off the dish perfectly, and you can add a little fresh basil for color.

This is definitely one of those 30-minutes-or-less meals, and everyone will be impressed you pulled off such a winning dish on a hectic weeknight!

Chicken Milanese is one of the signature dishes of Milan Italy. Thin cutlets of chicken, breaded and cooked until crispy golden brown make Chicken Milanese a simple family favorite!

Recipe Notes:

Check your chicken – I like to start by buying thin cut chicken breasts, sometimes called scallopine cut. If you can’t find these at your local market, though, simply place your palm flat against the top of each chicken breast to hold it steady, then cut each breast in half horizontally.

Whether you bought it or sliced it yourself, you still may need to pound the chicken breasts a little. You’re looking for ¼-inch, even thickness. Starting with thin cut chicken just makes the pounding easier and less arduous.

Forget the fryer – Although frying isn’t the healthiest choice, pan-frying still means fewer calories than a deep-fried recipe. If you want to reduce the Chicken Milanese calories, though, you can skip the stovetop and make a baked Chicken Milanese.

You’ll need to prep a large, rimmed baking pan with a rack (I like to line the pan with foil too), then place the breaded chicken breasts on top of the rack. Bake in a 425 degree oven for 10 – 15 mins (without turning).

The post Chicken Milanese Recipe appeared first on Gonna Want Seconds.
Easy Hunan Beef Recipe

$
0
0

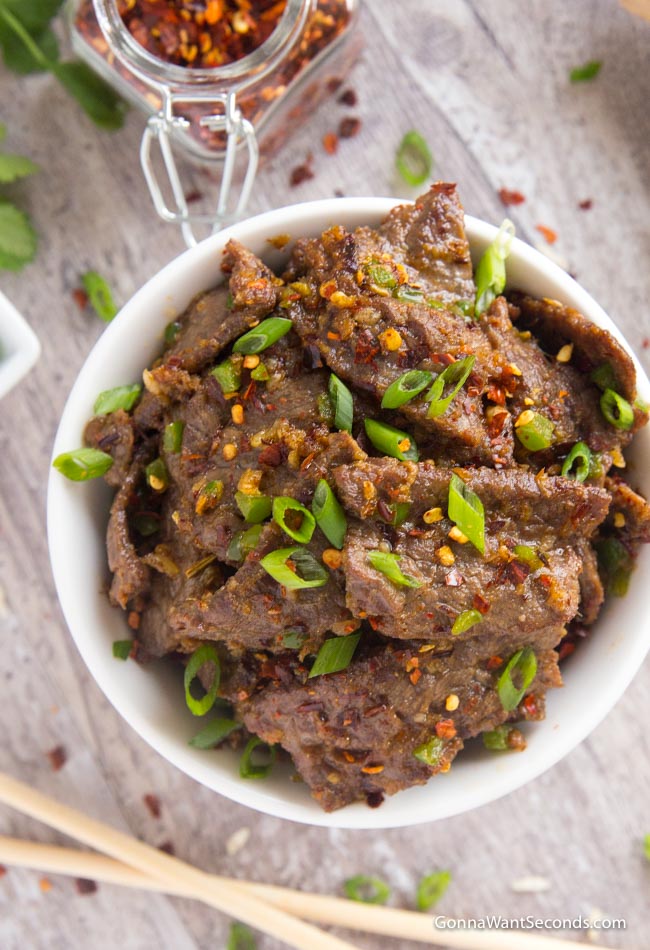
My Hunan Beef Recipe beats any take-out and will be ready before you can say “fortune cookie.” Your kitchen never smelled so good!

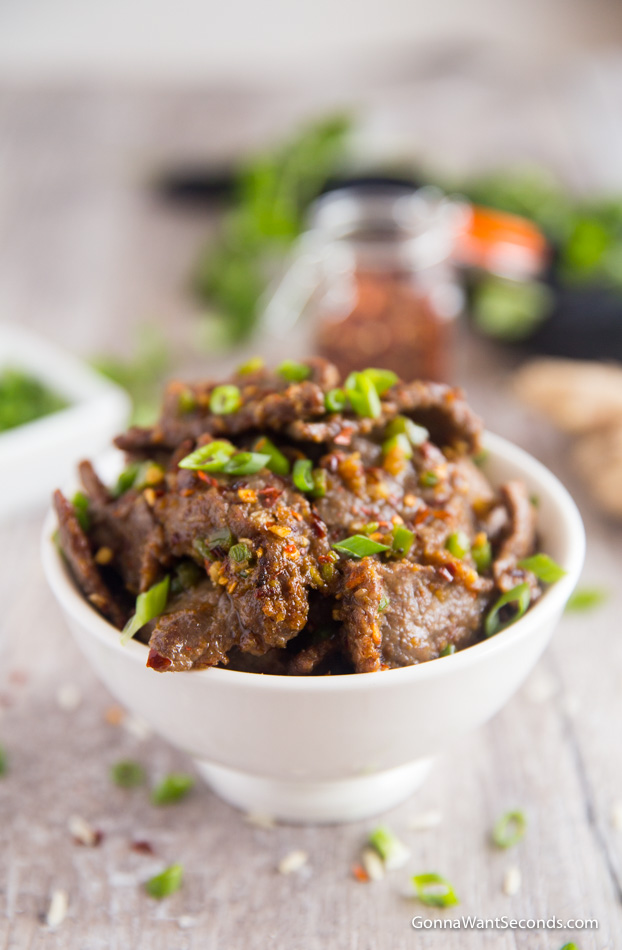
Hunan Beef Recipe in White Bowl

Did you know there are more Chinese restaurants in the U.S. than there are McDonalds?

Over three times more, to be exact. That’s definitely a testament to our love affair with Chinese cuisine and all the flavorful, textural masterpieces it has to offer.

And what do you think one of the most popular dishes order is?

Thats right, Hunan Beef, of course.

What does the word Hunan mean?

Hunan is a provence in Southeastern central China. Hunan cuisine is considered one of the Eight Great Traditions of Chinese cuisine and is typically hot and spicy and very aromatic.

Each region has its own signature – special combinations of ingredients, spices, or cooking techniques that distinguish it from its neighbor.  One of my favorite dishes is Hunan Beef, which hails from a mountainous region in the southern part of China.

It’s a simple recipe with a spicy kick that capitalizes on the rich, beefy quality of boneless short ribs. A quick marinade, even quicker stir-fry, and you’ll be ready to enjoy a classic Chinese dish at your own dinner table – no takeout required!

It’s the first ingredient to talk about because it’s a little different than the flank steak I use in other stir-fry recipes like Beef Chow Mein. We’re using boneless short ribs, one of the most flavorful, well-marbled cuts you can buy, not to mention it’s inexpensive . . . music to my ears!

These “ribs” are actually part of the chuck, not ribs at all, and you’re probably familiar with them as “kalbi” if you’ve dined at a Korean BBQ restaurant (the ones where you cook the meat right at your own table).

As with most cheap cuts, the short ribs typically require a long, slow cook to tenderize them, but when they’re sliced correctly (across the grain) and thinly, they’re perfect for a quick sear or stir-fry.

Hunan Beef

If you don’t have a friendly neighborhood butcher to take care of that step for you, I suggest partially freezing the ribs to aid in micro-slicing.

Next is the marinade, a scant amount, really, because this is a dry dish, not something saucy to pour over steamed rice. There’s just enough soy sauce and rice wine to help tenderize and flavori-ize, with a touch of potato starch.

Different starches behave differently, and cornstarch is the go-to for many Chinese dishes.

Since we won’t need to thicken a sauce, which cornstarch is pro at, I prefer potato starch in this dish. Beef Hunan style is essentially twice-cooked, deep-fried then stir-fried, and I find potato starch makes the beef slightly crispier than its corn-y cousin. It also makes this dish gluten-free if you substitute a gluten-free tamari for the soy sauce.

You’ll be grateful for the minimal marinade when it’s time to start deep frying since we all know how well water and hot oil mix!

Peanut oil is the perfect choice here since it has a high smoke point, with a subtle peanut flavor that works well with the other Hunan beef ingredients.

Keep in mind we’re frying at a lower temperature than typical deep-frying, so this step is really designed to seal all the flavor into the meat and create a little bit of a crust. Just make sure you drain the beef really well after the initial frying or it will absorb too much oil, ultimately marring the flavor and giving the dish an overall greasy texture.

Our flavor profile up to this point is pretty on-point with other Chinese beef dishes, but it’s in the sauce you find the differences.

What is the difference between Hunan and Szechuan beef?

According to the Hunan beef wiki, this cuisine is famous for its liberal use of garlic and chili peppers. When you compare Hunan beef vs Szechuan Beef, an infamously spicy dish, you’ll find Hunan spicy beef has a really straight-forward heat, designed to add a spicy quality while letting the other flavors come through.

Hunan Beef

Szechuan Beef, which is incidentally double-fried as well, has a more complex heat and flavor profile that’s focused primarily on the variety of peppers being used.

Looking at the differences between Hunan beef vs Mongolian beef, you’ll find the latter lacks the texture of the twice-cooked version and is a saucier dish that’s slightly sweet (thanks to the addition of hoisin sauce and/or sugar).

In my Hunan Beef Chinese ingredients are dominant – fresh garlic and ginger, sesame oil, and green onions, but I have a special addition that makes it unique: cumin.

Like most traditional recipes, I incorporate jalapenos and a generous amount of dried chili flakes, but I also add a touch of one of my favorite slightly spicy, smoky spices. It brings a warm, earthy quality to this dish, along with a subtle heat that I think makes my version a little more complex than other Hunan Beef recipes.

No veggies to see here, unless you count the green onion garnish, so I’d suggest serving this with bok choy or Chinese broccoli, or you can even steam one of the store-bought Asian stir-fry blends for a colorful side.

I like white or brown rice with this dish, but you can always serve it on top of lo mein or rice noodles if you’re in a pasta mood.

Grab some extra chili flakes for garnish (or for those who can never get quite enough hot stuff), and dinner’s served. Don’t forget your chopsticks!

Hunan Beef

Recipe Notes for Making Hunan Beef:

Protein Alternatives – If you want to change this recipe up a bit, you can make it with pork instead of beef. It works great with very thinly sliced pork shoulder (or “butt”) or even pork tenderloin.

You can also substitute pressed, cubed tofu, though I’d recommend using just a few tablespoons of oil for the first frying step, rather than the whole 1 ¾ cup, since even pressed tofu contains a lot of water.

Ginger – Unless you do a lot of cooking with fresh ginger, you may find yourself with leftover root (the kind I find in my crisper drawer once it’s changed from brown to green). Don’t wait until it’s past the point of no return. Freeze it!

You can either cut the ginger into chunks (I like 1-inch pieces) and put them in a freezer bag or go ahead and grate it. To grate it, use either a food processor or hand-held grater, then put the grated ginger into a zip-top storage bag, flatten it out to form a thin sheet (~ 1/8”), then pop it in the freezer where it can harden flat.

Whenever you need some, just pull out the bag, break off a chunk, then pop it back in the freezer.

It’ll keep for about six months.

Wok – I love using a wok for this dish since it’s designed specifically for this type of cooking (plus it’s a pretty cool piece of kitchen equipment!).

Every bit of its large surface area gets nice and hot, and that ensures ingredients cook quickly and efficiently (no steaming happening here!). If you don’t have a wok, just use the biggest, high-sided pan you can to keep all the ingredients, especially the hot oil, safely inside.

Source: Adapted from Revolutionary Chinese Cookbook

The post Easy Hunan Beef Recipe appeared first on Gonna Want Seconds.

Fried Eggplant

$
0
0

Rich, purple beauties get the crispy treatment in this Fried Eggplant recipe, a simple but satisfying dish that’s all about texture. A little patience, and the anticipation of munching on a crunchy piece, will make frying fun!

Fried Eggplant Recipe

Between fast-food chains and county fair booths, you might assume frying funnel cakes, French fries, or Oreos is an effortless endeavor.

The truth is there’s a touch of technique to getting everything just right.

Do you pan-fry or deep-fry? Use flour, batter, or breading? What about the oil? How hot is too hot, and can I manage a vat of frying liquid without needing emergency medical care?

Let’s demystify the frying process a bit and tackle one of my favorite appetizers: crispy Fried Eggplant.

Eggplant may not be on the “favorite vegetables” list for some people, but I’ve never had anyone turn down one of these crunchy slices!

Is fried eggplant good for you?

Eggplants themselves are a very nutrient-dense fruit (yeah, not a vegetable), touting tons of vitamins and minerals to combat everything from headaches to depression.

It’s also fiber-rich, which is great for heart health and digestive health and keeps you fuller longer (I see you, summer swimsuit!).

It’s the “fried” part we usually equate with not being healthy.

You can try oven fried eggplant instead, and it’s efficient if you’re making a baked eggplant parmesan or something where crisp isn’t critical. The oven-fried method just doesn’t create the same crunch, so it’s not gonna satisfy that fried-food craving the same way.

No, I don’t recommend eating fried food every day since no amount of treadmill time can undo such an onslaught.

There’s definitely an increase in fat for this otherwise low-fat food when you fry it, but you can minimize the absorption of excess oil by choosing a good breading and executing the frying method properly.

There are three types of frying: pan-frying where the pan is barely covered with oil – good for delicate things like crab cakes or thin cutlets of chicken or pork; deep frying in several inches of oil – good for items like French fries and doughnuts; and shallow-frying which is a happy medium – good for things like bone-in chicken, Hot Water Cornbread, and this eggplant recipe.

Some home cooks like deep fried eggplant, and I find that does work well if you use a batter and chunks (not slices) of eggplant. Using a coating like pancake or tempura batter, recipes for fried eggplant that incorporate deep frying yield a crispy but smooth exterior.

Personally, I prefer some additional texture on my eggplant, one only achieved with a proper breading and coarse bread crumbs, and that technique works much better with the shallow frying method.

One side of the eggplant is always in contact with the hot pan which helps sear the cooking side and creates a covetable crust.

The breading can make or break a recipe, and breaded eggplant recipes vary (even ways to make fried eggplant vegan by using almond milk instead of eggs).

You can choose a light breading, which is how to fry eggplant with flour, but it doesn’t create a thick enough coating to balance the texture of the eggplant.

You could opt for a heavy breading instead, like southern fried eggplant that’s dipped in buttermilk and cornmeal, but unless your slices are pretty thick (and take longer to cook), this method produces a breading-to-eggplant ratio that’s still a little off.

My breading is a three-step process that’s substantial enough to be worth the trouble of frying but without dominating the dish.  Using panko breadcrumbs too, rather than making fried eggplant without breadcrumbs, actually complements the texture of the tender eggplant.

Fried Eggplant Recipe

How do you make fried eggplant?

The first step is dusting the eggplant with cornstarch to give the rest of the breading something to cling to.

I prefer to use cornstarch instead of flour since it’s 100% starch (versus flour which is about 75%), and it gets super crispy (it’s what they use for that crusty General Tsao’s chicken at your favorite Chinese restaurant).

Cornstarch also has a finer texture which means it covers the surface area more completely and helps the egg stick practically everywhere. Be sure to salt your eggs first, by the way, since the salt helps break down proteins and thin the eggs a bit, making it coat the eggplant a little more easily.

The eggs help adhere the panko to our eggplant slices, and I like to use pre-seasoned to add extra herbs and spices. “Italian seasoning” means some mixture of garlic, onion, basil, and oregano, and the earthy quality of these ingredients really enhances the richness of the eggplant.

Now that you’re breaded and ready for frying, let the eggplant dry for a few minutes. Do NOT skip this step.

Excess moisture is messy and downright dangerous when you’re dealing with hot oil. It also makes the temperature drop too much when you add the eggplant which means you’re decreasing the potential for maximum crunch factor.

The drying time also helps the coating stick better to the eggplant while it’s cooking.

Make sure your skillet’s deep enough to hold the oil and eggplant, with enough height to keep the oil safely splattering inside. I also suggest using a straight-sided pan since fishing the fried bits out of a rounded-edge pan can be tricky business, especially if you want to avoid oil spillage (and stovetop fires).

I use a vegetable or other neutral-flavored, high smoke point oil for this recipe so you can keep it safely at about 375 degrees.

Hot oil forces the moisture (steam) out of the eggplant which helps prevent oil from moving into the eggplant.  If the oil isn’t hot enough, or you overcrowd the pan, oil can actually soak into your breading and make a sad, greasy mess.

Don’t gamble with a higher temperature, though, since you don’t want the exterior to brown (or burn) before the insides are finished cooking.

Expect to see lots of tiny bubbles surrounding the eggplant as soon as you drop the slices into the skillet.

It’s flipping time once the bubbles starting getting bigger and decrease significantly, then you’ll finish bronzing up these beauties on the other side.

Those big bubbles mean you’re about out of steam – literally – on that side and in danger of soggy-ville. Drain on paper towels before serving, both to catch greasy drops and to wick away any excess moisture.

Do you have to peel eggplant before frying?

I get asked this question a lot because I think many people assume you do, but I actually prefer to fry my eggplant with the skin on. Most of those vitamins and minerals I mentioned earlier are trapped inside that deep purple coating, and the skins of young eggplant will be perfectly tender after cooking.

It also adds a touch of color and helps keep the eggplant slices intact once the insides soften during cooking.

Frying isn’t a complicated process, but there are some basic rules to follow. I always advocate the whole “practice makes perfect” thing, especially since fried food executed properly is so darn good!

Just get in your kitchen and experiment with different methods of frying and breading and battering.

Fried Eggplant Recipe

A squeeze of lemon complements almost any savory fried dish, so definitely try it here, but you can also serve Fried Eggplant with marinara sauce. If you pile both on top of pasta, I think you can officially call it dinner (though it’s also good served with leftover Antipasto Salad)!

Recipe Notes for Fried Eggplant:

Batch frying – You’ll want to cook the eggplant in batches to avoid overcrowding. Keep the fried eggplant warm in a 200 degree oven, on a paper-towel-lined cookie sheet, while you finish.

Eggplant perfection – When you’re picking out eggplants, choose the freshest you can find and use them in less than a week. Look for shiny, plump specimens, not dull and wrinkly ones. Smaller is preferable too, since the larger ones tend to be more mature and potentially bitter.

Did you say bitter? – You’ll notice I don’t pre-salt the eggplant for this dish. There are lots of thoughts on whether salting is needed, but the general consensus is if you’re dealing with fresh, young, firm eggplants, salting ahead of time isn’t required.

In addition to pulling out some of the bitter juices, which adds extra moisture you’ll have to deal with before breading, salting also changes the texture of the eggplant. It’s best to just opt for eggplants that don’t need the whole “youthening” treatment.

Fried Eggplant

Our Fried Eggplant recipe, creates an easy crispy dish that’s all about texture.This Italian delight only needs a couple of unique ingredients, like panko, to make it foolproof. Our technique shows you how to getting everything just right. Makes a great appetizer, side dish or light meal.

  • 1 Large Egg
  • 1 Teaspoon Salt
  • 1/3 Cup Cornstarch
  • 1 Small Eggplant (Cut Into 1/4 Inch Thick Slices)
  • 1 Cup Italian Seasoned Panko Bread Crumbs

Serve With:

  • Lemon Wedges-Optional
  • Jarred Marinara Sauce-Optional
  • Sliced Mozzarella-Optional
  1. In a small shallow bowl, beat the egg with 1/4 teaspoon salt. In 2 more separate shallow dishes, pour the cornstarch and panko bread crumbs. Dredge each slice of eggplant in cornstarch, coating it thoroughly then gentle tapping off excess, then in egg mixture, then in the panko crumbs, pressing them to help them stick. Transfer coated eggplant to a wire rack and allow coating to set 20 minutes.
  2. Heat 1/2 inch oil in a a heavy bottom, skillet with straight sides 2 inches tall, to 375degrees. Fry the eggplant slices in batches, for 1 minute on each side, or until golden brown. Transfer to paper towel lined baking sheet. Season with additional salt and pepper. Over hot eggplant, squeeze lemon wedges, or top with marinara sauce or mozzarella if using, and serve.

More Side Dishes!

Scalloped Corn – Golden corn cradled in a rich homemade custard with just the right amount of smokey bacon topped with a crunchy bread crumb topping!

Sauteed Asparagus – Perfectly tender and flavored asparagus!

Roasted Garlic Asparagus with FetaTender asparagus infused with garlic and perfectly coated with feta!


The post Fried Eggplant appeared first on Gonna Want Seconds.

Hamburger Casserole Recipe

$
0
0

This hearty Hamburger Casserole is a guaranteed hit, even with the picky eaters in your family. Want a whine-free zone at your dinner table? I’ve got your back!

This Hamburger Casserole is always a family favorite

Raise your hand if you were a picky eater as a child.

If you’re not reluctantly waving in the air right now, chances are someone in your house regularly made (or continues to make) gagging noises at the dinner table.

Cooking for kids is a challenge, to say the least, but I have a sure-fire winner you’ll want to add to your repertoire, whether those picky eaters in your house are children or adults: my Hamburger Casserole.

This is my son Kyle’s favorite casserole.

He’s the family’s “picky eater,” but this dish still puts a big smile on his face. In fact, I made Hamburger Casserole so often when he was little, my whole extended family always referred to it as Kyle’s Casserole!

For years I’ve wanted to share this treasured family recipe on my blog but Ky, well, he’s a bit possessive.

I was finally able to break him with enough begging, and a suggestion that his little concession could benefit picky eaters all over the world.

We both hope the Kyles in your life enjoy this ground beef goodie as much as my sweet Kyle does!

Easy Hamburger Casserole

Not Yo Mamas Hamburger Casserole!.RECIPE–http://www.gonnawantseconds.com/2018/01/hamburger-casserole-recipe/

Posted by Gonna Want Seconds on Wednesday, February 14, 2018

What cut of meat is used to make ground beef?

We’ll obviously need ground beef for the “hamburger” part of this dish, so it’s worth talking a bit about the different blends and how they flavor (and fatten!) things differently. As a general rule, the more fat there is in the cut or blend, the more flavor it has.

“Ground beef” refers to a combination of any beef leftover from trimming or cutting roasts and ribs the butcher did that day.

A ground beef blend can include anything from the top shoulder (or chuck) all the way down to the bottom (back) flank.

Although the cuts in ground beef vary from one package to the next, the lean-to-fat ratio is generally noted on the package, and will have no more than 30% fat (or a 70/30 blend).

I prefer a slightly leaner ground beef for this dish, an 80/20 combination, and you can use either a ground beef that fits the bill, or a ground chuck, which has a similar ratio.

This Hamburger Casserole is always a family favorite

How do you make a hamburger casserole?

Hamburger casseroles usually fall into one of two categories: ground beef rice casserole or ground beef pasta casserole recipes.

Technically there are also hamburger potato casserole recipes (even hamburger tater tot casserole), but I consider those a different animal all together since the texture’s quite a bit different and the whole “texture” thing is one that makes picky eaters even more picky.

I use pasta in my version, like big, chunky pieces of farfalle or penne, which I prefer to making a hamburger macaroni casserole (save the small elbows for another child-approved dish like my Beefaroni).

I find the larger shapes work better from a texture perspective, and cooking it before adding it to the casserole helps you control how much it cooks and avoid complaints about mushy pasta.

Other than texture, keeping those sensitive diners happy means cooking mildly spiced, minimally vegged recipes.

This one fits that bill without sacrificing flavor (for those of us with more sophisticated/forgiving palettes). I only use onions and green peppers in the veggie base for this dish, so there’s enough subtle flavor to complement the tomato-based sauce without triggering any frowny faces.

Rather than using canned tomatoes, I make my sauce for this Hamburger Casserole using condensed tomato soup.

It’s a trick I use in other dishes like Porcupine Meatballs because it adds a subtle tomato flavor that’s low on acidity and generally pleasing to little dudes and dudettes.

Pre-made pasta sauces are convenient, but even a plain marinara may be a little more herb-y than we want. I prefer to control all the seasoning myself since strong spices like basil and oregano can mean an instant dinner-time failure.

Another secret ingredient in my Hamburger Casserole that adds some non-offensive flavor is chili sauce.

This isn’t the Asian condiment that’s full of floating red pepper flakes or something spicy you might find in a Mexican ground beef casserole. It’s a slightly tangy version of ketchup, thanks to a touch of vinegar, with its own seasonings like garlic and onion powder.

You may have used it as an easy topping for meat loaf or a simple sauce-builder for sloppy joes, but this often-forgotten condiment is perfect in this dish. It adds enough acidity to make the flavors interesting but balanced with a touch of sweetness to make the whole profile more kid-friendly.

I like to add a little Sriracha to the sauce too since a teeny bit of heat is actually a-okay at my dinner table.

If your family’s especially sensitive, though, you can certainly omit it and serve it on the side. By the way, hamburger seems to be pretty innocuous amongst the picky eater crowd too, but this casserole definitely works with ground turkey if it’s preferable for any reason.

There’s also cheese in my casserole, of course, since all the best hamburger casserole recipes (and any casseroles, for that matter) have some.

Unlike other family favorites like my Impossible Cheeseburger Pie, I like to mix some cheddar into the casserole as well as sprinkling some on top with the breadcrumbs.

This technique makes the casserole a little richer and, well, cheesier, plus the cheesy, crunchy topping is definitely the key to winning that hard-fought texture battle.

You can serve this casserole with a salad, steamed broccoli, peas, or whatever green thing your brood can handle.

If you’re feeling particularly brave, you can even sneak a little finely chopped, cooked spinach into the casserole since the other flavors will really mask this mild green. No need to let them know they might be eating a vegetable – just tell them it’s parsley!

One of the most effective methods I know for helping picky eaters find their own bravery around food is to get them into the kitchen.

Something magical happens when they see all the ingredients and help put a meal together – they’re more adventurous because they actually had a hand in what’s getting served on their plates. You may just help them discover their own, brand-new family favorite!

This Hamburger Casserole is always a family favorite

Recipe Notes for Hamburger Casserole:

Chili Sauce – You’ll find this on the condiment aisle, and I like the one in ​the round jar labeled “homade”​ by a company called Sona. If you can’t find that brand, Heinz will ​work too.

Pasta – Don’t confuse this with some of the other hamburger noodle casserole recipes.

Since this dish has an Italian flair, I really don’t like to use egg noodles. Instead, I choose a good quality Italian pasta like farfalle or campanelle or a short tube-shaped pasta like penne.

Leftovers – As you can tell, this recipe makes a ton which is great if you have a big group to feed (or can send leftovers in lunchboxes during the week).

If not, this is a perfect casserole to toss in the freezer.

Divide the mixture between two 9” square pans, bake, then freeze half for another meal. It’ll just need to thaw a day ahead of time in the fridge before reheating.

If you’re saving some to freeze, I’d also suggest cooking that pan without the topping, covered with some aluminum foil. Adding the topping before reheating, rather than pre-freezing, will make sure it has a nice crunch.

Hamburger Casserole Recipe

  • 16 Ounces Dried Farfalle Pasta
  • 1 Cup Onion (Chopped)
  • 1 /2 Cup Green Pepper (Chopped)
  • 2 Pounds Ground Beef (80/20)
  • 1/2 Teaspoon Salt
  • 1/2 Teaspoon Black Pepper
  • 1 1/2 Teaspoon Garlic Powder
  • 2 Cans Condensed Tomato Soup
  • 1 1/2 Cups Water
  • 3/4 Cup Chili Sauce
  • 1 Teaspoon Sriracha Sauce
  • 2 1/2 Cups Sharp Cheddar Cheese (Shredded-Divided)
  • 2 1/2 Cups Mozzarella Cheese (Shredded~Divided)
  • 1 1/2 Cups Soft Fresh Bread Crumbs
  • 3 Tablespoons Butter (Melted)
  1.  Preheat oven to 350 degrees. Spray an 11X14 inch baking dish with nonstick cooking spray.
  2. Cook noodles according to package directions in salted water until al dente.  Drain thoroughly.
  3. In a large nonstick skillet, on medium heat, cook the onion and green pepper until veggies are beginning to soften.  Add the beef  to skillet.  Sprinkle meat and veggies with salt, pepper and garlic powder. Cook until there is no longer any pink in the meat, about 10 minutes. Drain excess fat.
  4. Dry the pasta pot then use it to mix together soup, water, chili sauce, Sriaracha, and 1 cup cheddar cheese, 1 cup mozzarella cheese until combined. Stir in drained noodles and beef mixture. Transfer to a greased 11×14 baking dish.
  5. Sprinkle top of casserole evenly with remaining 1 1/2 cup of Cheddar cheese and1 1/2 cups of mozzarella. Toss bread crumbs with melted butter and sprinkle over
  6. casserole.  Bake at 350 degrees for 35-40 minutes or until bubbly and golden.

More Beef and Hearty Meals!

Beefaroni – Quick easy, and perfect meal for the simplified flavor palates of kids.–Ready in less than 30 minutes!

Vegetable Beef Soup – This is loaded with tender chunks of beef, incredibly rich broth, and all the right veggies!

Beef Barley Soup – There’s almost nothing better than fresh veggies in a hearty beef vegetable barley soup!

The post Hamburger Casserole Recipe appeared first on Gonna Want Seconds.


Alton Brown Meatloaf Recipe

$
0
0

There’s just no competing with the Alton Brown Meatloaf recipe. You’ll make some magic in your kitchen
with this beefy beauty, scientifically engineered by Mr. Brown himself to be the best!

Alton Brown Meatloaf on a 1hite platter surrounded by broccoli and carrots

I’m pretty sure if you look up the word “hearty” in the dictionary you’ll find a picture of a dense, rich meatloaf with a shiny, sticky glaze dribbling down the sides.

It’s the dish no one else can make quite like mama used to, and having a good meatloaf recipe is probably listed somewhere as the key to a happy marriage (Spoiler Alert: The Alton Brown Meatloaf recipe fits the bill!).

Meatloaf has been around since gladiators were fighting in big arenas, and practically every country on our big, blue globe has some version of ground meat pressed into that classic loaf shape.

I’m sure this is partly because combining meat with some fillers is a great way to stretch an expensive ingredient to feed more mouths, but it’s also because there really aren’t many things that say “comfort food” quite like a quality meatloaf.

What is the best meatloaf recipe?
I don’t think anyone’s ever answered that question quite as well as Mr. Brown: “Great meatloaf is always juicy, but it never falls apart. It is neither bland nor so heavily seasoned that it loses its meaty soul.” I agree completely, and I think you’ll agree this meatloaf is real “soul” food.

When it comes to meatloaf recipes Alton Brown is always a reliable resource (for pretty much anything other than meatloaf too).

It’s hard to argue with a food scientist! He’s also a fan of meatloaf in general, which gives him some cred in my book.

The Alton Brown meatloaf Best Thing I Ever Made version is a show-stopping, smoked meatloaf with complex seasonings like cocoa powder and chipotle peppers (oh, and potato chips). If the Alton Brown smoked meatloaf seems a little too snobby for your mashed potatoes, though, the classic Good Eats version can’t be beat.

His Good Eats meatloaf episode is a great one to catch on re-runs or YouTube to learn about different cuts of beef and the benefit of grinding your own for burgers or meatloaf. Although I’m not quite ready to invest the extra time and energy for grinding, the flavors and textures accomplished by using his meatloaf methods are perfectly dialed in.

Alton Brown Meatloaf on a 1hite platter surrounded by broccoli and carrots

I think the biggest take away for the meatloaf Alton Brown prepared for us in that show is to choose your meat wisely. The episode is all about beef, though you can certainly make meatloaf with many different meat combinations: beef and pork; beef, veal, and pork (like the meatloaf recipe Food Network Bobby Flay created), and, of course, a good Turkey Meatloaf.

When it’s a meat and potatoes kinda night at my house, though, the family’s expecting a beef fix, so Mr. Brown’s advice is spot on for what I want on my table.

Lots of recipes, like the meatloaf Paula Deen makes, use regular ground beef. “Ground beef” purchased from a grocery store is made from all the odds and ends the market trimmed off or didn’t use that day, everything from the cheapest chuck to the finest filet.

The only problem with relying on premixed ground beef is the combo will vary from day to day, which means the beefy flavor and fat content will vary as well.

To make the Alton Brown Meatloaf, he suggests using a nice, beefy lean cut (ground sirloin) and a flavorful fatty cut (ground chuck) to make sure the flavor-to- fat ratio is just right.

Alton actually describes his recipe as an “inside out” burger on the show, and that’s really true!

The fluffy bun gets incorporated as dry breadcrumbs, but with a unique twist. Rather than using fresh or “seasoned breadcrumbs,” which are usually mixed with Italian seasonings and Parmesan, he uses garlic-flavored croutons. Genius!

The purpose of breadcrumbs (or oatmeal) in a meatloaf recipe is to work along with the eggs as a binder. Ground beef, regardless of the cut it comes from, creates a course texture; the addition of starchy ingredients softens that a bit and creates that classic, velvety mouthfeel we’re after in a good meatloaf.

Using croutons instead of regular breadcrumbs also means you have the benefit of a little extra fat (moisture), plus, even though they’re seasoned, the flavor base is more neutral than the basil and oregano Italian variety.

The veggies – garlic, onions, bell peppers, and carrot – also add moisture, but since we’re dealing with a nice fatty blend of beef (rather than something leaner like turkey), we can actually skip the saute step and use them raw. Just be sure they’re finely chopped so they’ll incorporate seamlessly with the beef.

We’ll season the beefy mixture with salt and pepper, of course, but also a bit of thyme, cayenne pepper, and chili powder. This is the perfect blend to accentuate the beef and aromatics we’ve incorporated without dominating the flavor profile.

Just remember to gently combine the ingredients once everything’s in the mixing bowl. Too much kneading or squishing of the beef can toughen the mixture, and we want a tender, juicy meatloaf. I suggest just getting your hands in there so you can work everything more easily.

Some people prefer to bake their meatloaf in a loaf pan, but Alton’s method (and mine as well) is to mold the meat and bake it naked. The loaf pan traps a lot of the fats that would normally ooze off to the sides, which means you’ll end up with a soggier, greasier, and less stable meatloaf.

This isn’t exactly a crispy meatloaf recipe, but the exterior will be dryer and have more texture than one that’s been baked in the pans. It’ll also hold together better when slicing.

What can you put on top of meatloaf?
Bacon. Lots of bacon. You can also drizzle the top with store-bought barbecue sauce, Heinz 57 sauce, or
even plain (or spicy!) ketchup.

If you want something a little more interesting, though, it’s easy to whip up a quick topping or glaze to complement that beefy soul we’ve crafted underneath.

When it comes to a meatloaf glaze recipe, it can range from sticky sweet (like the one I use in my Brown Sugar Meatloaf) to a more traditional topping of ketchup, mustard, sugar, and a dash of hot sauce (like the meatloaf Pioneer Woman makes). The Alton Brown Meatloaf combines the best of them both by using ketchup seasoned with smoky cumin and a dash of Worcestershire sauce, adding just a touch of honey to balance those flavors.

Why don’t we glaze the meatloaf before putting it in the oven? Because allowing just ten minutes in the oven for the outside of the meatloaf to dry out and seal in some of the juices means that tasty glaze will actually stay on  top, not get watered down by the beefy liquids trying to escape during the cooking process.

Alton Brown Meatloaf on a 1hite platter surrounded by broccoli and carrots

How long do you bake meatloaf in the oven?
This meatloaf recipe, which has about 2 ¼ pounds of meat, will need about an hour to reach 155 degrees. I know there are some die-hard slow cooker fans out there, and if you opt to make this in your crockpot, it’s quite a bit longer – 5 to 6 hours on low.

Once it’s finished baking, let it rest a few minutes (you don’t want it falling apart now!), and you’re
ready to dive into meatloaf heaven.

This Alton Brown Meatloaf may just be better than your mama’s, though I’m not sure I’d tell her that.

Recipe Notes for Alton Brown Meatloaf:

Line it – So much caramelization goes on in this recipe, which is what makes the covetable crispy bits on the outside of the meatloaf and thickens the glaze. What you don’t want is all that baking magic happening on top of your best baking dish. Either line the baking sheet with parchment paper or foil to make clean-up easier. If you skip this step, you’ll be tempted to toss that dish!
Let’s talk leftovers – There’s always the classic meatloaf sandwich to make short work of any leftovers, and you can add it to a grilled cheese if you want to up your lunch game. This Alton Brown Meatloaf is perfect crumbled up, though, in chili or stuffed into bell peppers and baked with a little cheese on top. You can also freeze it.

INSTRUCTIONS
1. Adjust oven rack to center position. Preheat oven to 325 degrees. Line a rimmed baking sheet with parchment paper. Set aside.
2. Combine the croutons, black pepper, cayenne pepper, chili powder and thyme in the bowl of food processor. Pulse until the mixture is a fine crumb. Pour crumb mixture into a mixing bowl. Add onion, carrot, garlic and red pepper to food processor and pulse until the vegetables are finely chopped (don’t over-pulse since we don’t want a puree). Add the chopped vegetables, chuck, sirloin and salt to the
bread crumbs and combine. Mix in the egg and combine thoroughly, but don’t squeeze the meat.
3. Press the mixture into a 10-inch loaf pan to shape the meatloaf. Turn the meatloaf out onto prepared baking sheet. Bake for 10 minutes in preheated oven.
4. Meanwhile make the topping by combining ingredients in a small mixing bowl. After meatloaf has baked 10 minutes, remove it from oven and brush the ketchup mixture over the top and sides. Place back in oven and bake until cooked through, about 55-65 minutes, or internal temperature reaches 155 degrees. Let rest 10 minutes before slicing and serving.

Alton Brown Meatloaf

There’s just no competing with the Alton Brown Meatloaf recipe. You’ll make some magic in your kitchen with this beefy beauty, scientifically engineered by Mr. Brown himself to be the best!

  • 6 Ounces Garlic Flavored Croutons
  • 1/2 Teaspoon Black Pepper
  • 1/2 Teaspoon Cayenne Pepper
  • 1 Teaspoon Chili Powder
  • 1 Teaspoon Dried Thyme
  • 1/2 Large Yellow Onion (Roughly Chopped)
  • 1 Carrot (Peeled and Cut Into 1 Inch Pieces)
  • 3 Cloves Garlic (Peeled)
  • 1/2 Red Bell Pepper
  • 18 Ounces Ground Chuck
  • 18 Ounces Ground Sirloin
  • 1 1/2 Teaspoon Salt
  • 1 Large Egg

Topping:

  • 1/2 Cup Ketchup
  • 1 Teaspoon Dried Cumin
  • Dash Hot Sauce
  • 1 Tablespoon Honey
  1. Adjust oven rack to center position. Preheat oven to 325 degrees. Line a rimmed baking sheet with parchment paper. Set aside.
  2. Combine the croutons, black pepper, cayenne pepper, chili powder and thyme in the bowl of food processor. Pulse until the mixture is a fine crumb. Pour crumb mixture into a mixing bowl. Add onion, carrot, garlic and red pepper to food processor and pulse until the vegetables are finely chopped (Don’t over-pulse-since we don’t want to go as far as puree). Add the chopped vegetables, chuck, sirloin and salt to the bread crumbs and combine. Mix in the egg and combine thoroughly, but don’t squeeze the meat.

  3. Press the mixture into a 10 inch loaf pan to shape the meatloaf. Turn the meatloaf out onto prepared baking sheet. Bake for 10 minutes in preheated oven.
  4. Meanwhile make the topping by combining ingredients in a small mixing bowl. After meatloaf has baked 10 minutes, remove it from oven and brush the ketchup mixture over top and sides. Place back in oven and bake until cooked through, about 55-65 minutes, or internal temperature reaches 155 degrees. Cool for 10 minutes before serving.

The post Alton Brown Meatloaf Recipe appeared first on Gonna Want Seconds.

Mexican Spaghetti Recipe-A Delicious Mexican Twist on Spaghetti

$
0
0

Mexican Spaghetti, one of my favorite one-pot wonders, adds a little “spice” to your dinner table and shaves valuable time off a busy weeknight.

Don’t you just love collecting good recipes?

Maybe you’re obsessed with the top secret ones you’ve bribed restaurant owners for, or the old, stained, hand-written family recipes uncovered in dusty attics, or the complicated additions to your bulging recipe box of show-stopping sweets (for that bakery you’re determined to open some day).

Me, I love them all, but I’m particularly fond of ones that make me a weeknight warrior, the recipes that miraculously create a spectacular meal in one – count ‘em ONE – pot, and in under 30 minutes.

This Mexican Spaghetti recipe, also called fideo, is one that gets pulled out of the recipe box pretty frequently at my house (though I really don’t need the recipe anymore at this point, LOL), and you’ll definitely want to add it to your one-pot repertoire!

What is Mexican fideo?

Fideo means “noodle” in Spanish, and authentic Mexican spaghetti is cooked using the pilaf method, similar to Mexican rice, where the noodles are toasted, sautéed a bit with aromatics, then cooked in a mixture of tomatoes, water or broth, and Mexican spices.

There’s also a version that’s a tomato-free Mexican spaghetti with sour cream and hamespagueti a la crema con jamón.

My version adds green chilies, corn, hearty ground beef, all with a generous sprinkling of cheese melting on top.

I suppose the thing that makes Mexican spaghetti fideo is that toasting step, which I skip in my recipe since it tends to make the final dish a little greasier than I’d like, but it still has all the robust flavors you’d expect from mixing Italian and Mexican cuisines.

It basically has all the ingredients of a savory Mexican spaghetti casserole (and you know I’m a die-hard fan of spaghetti casseroles if you’ve ever tried my Million Dollar Spaghetti), but it all comes together on the stovetop!

How do you cook Mexican spaghetti?

This easy Mexican Spaghetti recipe starts by sautéing diced onions with ground beef. The standard ground beef blend (70% lean to 30% fat) will work here, or even a nice ground chuck. Just make sure you drain the grease off once everything’s brown so we can avoid that “greasy” problem I mentioned earlier.

Next we’ll build the flavorful base to cook the pasta in.

The Mexican Spaghetti sauce has tomatoes, of course, and I use a combination of diced tomatoes (with their juice!) and tomato sauce.

That means we’ll have nice bright bites from the big red fruit, as well as some velvety, more subtly acidic sauce to help thicken everything. I also like to add a little corn for a touch of sweetness.

Now for the seasoning and the “Mexican” part of this spaghetti!

I start with a packet of taco seasoning mix. This is one of my favorite store-bought time-savers to keep on hand because it literally has some of every-thing you need to make a Mexi-anything!

Onion, garlic, cumin, chili powder, paprika, oregano . . . I have several packets in my pantry at all times for taco emergencies.

Canned green chilies are the next ingredient on the list and the one that adds just the right amount of spiciness to this dish.

This isn’t a Mexican green spaghetti recipe, which has so many poblanos, cilantro, and tomatillos that it looks like something Dr. Seuss would write a book about, but there’s enough you’ll notice a little touch of heat, or more if you opt for the “hot” or “spicy” variety, rather than “mild.”

I like to use Hatch chilies sometimes too, and, because I do like things spicy, I’ve been known to throw in an extra can to bump up the heat a bit.

All that’s left is the spaghetti, broken into bite-sized pieces, and some water to thin the sauce enough to offset the amount the pasta absorbs during cooking.

This stovetop method is one of the most brilliant ways to cook pasta since it saves the extra step of pre-boiling it in a separate dish (you know, another dish that will need WASHING), but it also means instead of just salted water the pasta will absorb all the other flavors going on in this dish.

The sauce will look a little thin at this point, but it’ll thicken up as the noodles expand and soften and some of the starch seeps in to thicken it.

Every spaghetti needs cheese, even Mexican spaghetti. This isn’t a creamy, cheese-loaded dish like some of the Mexican spaghetti Velveeta Rotel versions (similar to my Chicken Spaghetti but with beef). Instead we’ll add it as a gooey garnish once the pasta’s perfectly tender.

With all the strong seasonings in this dish, I prefer to complement them with a nice medium to mild cheddar sprinkled on top, rather than having big rivers of cheese running through it.

I do like to change things up a bit occasionally and use a pepper jack cheese instead of the cheddar, which is slightly creamier and adds a little more heat (bring on the caliente!).

How do you make taco pasta?

Have you heard of this crazy thing called spaghetti tacos?

I’ll admit it seemed a little strange to me at first to think about stuffing crispy corn tortilla shells with spaghetti, but it actually really works with this Mexican-flavored spaghetti recipe! After filling your taco shell, you can top the Mexican Spaghetti with sour cream, chopped avocados, lettuce, or salsa  . . . basically anything you’d top a beef taco with.

Try it – you’ll like it!

I love this Mexican Spaghetti recipe because it truly couldn’t be simpler and even picky eaters will call this one “a keeper.” If you don’t mind washing one more dish, you can always serve a green salad on the side (with a nice cilantro, lime vinaigrette, YUM!), though it’s really a nice meal on its own.

All it takes is a little Italian/Mexican fusion to marry taco night with everyone’s favorite pasta and create everyone’s new favorite weeknight meal!

Recipe Notes for Mexican Spaghetti: ​

Let’s talk turkey – Not a ground beef fan or just want to lighten things up a bit?

You can easily substitute ground turkey or chicken in this recipe. You can also use leftover chicken chunks (or a store-bought rotisserie chicken) to make this a Mexican chicken Spaghetti.

Picky about pasta – A gluten-free or whole wheat pasta works well in this dish, though you may need a touch more water and cooking time if you go the whole wheat route.

If you’re really watching your carbs, you can use spiralized zucchini noodles or make a Mexican spaghetti squash version. Just omit the water in the recipe and cook the sauce long enough for the flavors to meld.  

Toss it with steamed spaghetti squash shreds or blanched veggie pasta instead of actual spaghetti.

Seasoning mix savvy – If you use taco seasoning mix as much as I do, it might be worthwhile to make up a big batch from scratch to keep on hand. There are lots of recipes to choose from online, and you likely have all the ingredients in the pantry already.

The homemade version gives you the flexibility to adjust the seasonings to your liking, perhaps lowering the salt, for example, or bumping down (or up!) the heat.

If you have a homemade mix to substitute in this recipe, you’ll need about 2 Tablespoons to equal a packet.

Mexican Spaghetti

Our Easy Mexican Spaghetti Recipe is a delicious One Pot wonder! Filled with beef, pasta, tomatoes, corn and taco seasoning, this is a meal the whole family will love! Its also finished with a cheesy topping. Mexican Spaghetti is perfect for a busy weeknight dinner.

  • 1 Pound Ground Beef
  • 1 Medium Yellow Onion
  • 1 Envelope Taco Seasoning
  • 1 7 Ounce Can Dice Green Chilies, Undrained
  • 1 14.5 Ounce Can Canned Diced Tomatoes, Undrained
  • 1 Cup Frozen Corn (Thawed and Drained)
  • 1 8 Ounce Can Tomato Sauce
  • 2 3/4 Cups Water
  • 8 Ounces Dried Spaghetti Noodles (Broken into Thirds)
  • 1 Cup Cheddar Cheese (Grated)
  1. 1.In a large skillet over medium heat, brown beef and onion until there is no longer any pink in the beef. Drain off any fat. 

    2.Stir in taco seasoning, green chilies, diced tomatoes, corn, tomato sauce, and water and bring to a boil. Stir in noodles. Reduce the heat and simmer, covered, for 20-25 minutes or until the pasta is al dente.

    3.Sprinkle with cheese and serve.

Source: Gonna Want Seconds

The post Mexican Spaghetti Recipe-A Delicious Mexican Twist on Spaghetti appeared first on Gonna Want Seconds.

Chicken Scarpariello Recipe

$
0
0

A classic Italian-American dish, Chicken Scarpariello transforms simple chicken thighs into a delicious dinner with a sauce so dazzling you’ll be scraping your plate to get every last drop!

Doesn’t “Chicken Scarpariello” sound like a dish straight out of the Godfather movies?

Italian practically oozes from the title like mozzarella on a hot slice of pizza. It’s a dish that definitely does not disappoint for all you Italian-food lovers out there!

Chicken Scarpariello in a white oval plate

WHAT DOES SCARPARIELLO MEAN?

Scarpariello comes from the word scarparo, which means shoemaker or cobbler in Italian.

“Shoemaker Chicken” just doesn’t have same, uh, ring to it, though, so you’ll find it referred to in the Italian-style on menus here in the U.S. where thankfully most of us don’t know enough Italian to associate this dish with feet.

Shoemaker-style chicken is likely an Italian-American dish, rather than one adopted directly from their European homeland, but the origin of the name is still a bit of a mystery.

Some stories attribute the name to the resourcefulness of shoemakers and its similarity to the creative use of ingredients in this dish. Others focus on how quickly this dish comes together, something a busy shoemaker could prepare in a short amount of time after a long day in the cobbler shop.

Chicken Scarpariello in a cast iron skillet with fingerling potatoes at the back

WHAT IS CHICKEN SCARPARIELLO?

Chicken Scarpariello is a braised chicken dish which produces the heavenly, to-die-for Scarpariello sauce that makes this such an unforgettable meal.

Although it’s not a cream-based sauce, like I use in my Chicken Florentine, it has a creamy consistency that’s just as addictive! You’ll usually find plenty of peppers, some vinegar to increase the acidity of the sauce, and lots of garlic.

Some recipes make chicken Scarpariello with sausage while others (like the chicken Scarpariello Giada de Laurentiis makes) use prosciutto.

The dish is often served with crispy, roasted potatoes on the side (probably because they’re so good at absorbing the amazing sauce).

WHAT IS CHICKEN PIZZAIOLA?

This may sound like another dish you’ve heard of – chicken pizzaiola, but tomatoes, that ripe, red fruit that’s practically synonymous with Italian cuisine, is lacking from Chicken Scarpariello.

Chicken pizzaiola, which is basically a pizza in a skillet, has a hearty tomato sauce, as well as a generous sprinkling of cheese on top. There’s no cheese in Chicken Scarpariello either. Chicken Scarpariello in a white oval plate

WHAT IS A SCALLOPINI OF CHICKEN?

Those are the thin, boneless chicken breast cutlets that cook in a flash, but they don’t work as well as the bone-in thighs in this dish.

Some recipes, like the chicken Scarpariello Rachael Ray version, use cut up chunks of boneless chicken breasts, which cook up almost as fast as the scallopini, but you’ll find there’s so much more flavor in the thighs. Although the Chicken Scarpariello cooks pretty quickly, there’s still some breakdown of the bones and connective tissue in the thighs that help enrich the sauce.

Unlike other classic Italian-American dishes like Chicken Vesuvio which is almost always made with a whole cut-up chicken, the cut used in this dish will vary based on whose mama’s doing the cookin’.

The chicken Scarpariello Lidia Bastianich makes is a boneless chicken Scarpariello with sausage that uses thighs only.

The chicken Scarpariello Anne Burrell makes starts with a whole, bone-in chicken cut into the standard eight pieces.

Of course, there’s also the legendary chicken Scarpariello Carmines in New York City serves that uses chicken wings. I think Buffalo wings might have a serious competitor!

I LOVE this version of Chicken Scarpariello, though, since the bone-in thighs really pack the most flavor, and you don’t have to worry about different pieces cooking at different times.

The first step is roasting the potatoes. Some recipes call for roasting these in the same pan as the chicken, but they just don’t get the same crispy exterior.

Fingerling potatoes are also the way to go here since their small size and firm texture are ideal for this cooking method. They cook fast but hold their shape well when you start dragging them through the sauce on your plate.

Chicken Scarpariello in a cast iron skillet

How to Make Chicken Scarpariello

While those are roasting away in the oven, you can start the rest of this dish on the stovetop.

You’ll brown the seasoned chicken thighs in a hot pan first.

Just remember not to season them too far ahead of time or else you’ll have some extra moisture to deal with (and remember hot oil plus water equals pain and a messy stovetop). If you don’t have a cast iron skillet, a high-sided, oven-safe skillet will work just fine.

Next we’ll brown the Italian sausage in the same pan. This recipe calls for a sweet Italian sausage, which is essentially just the mild version of hot Italian sausage. Some “sweet” versions have a little basil in them, as well as the traditional flavors of fennel and garlic.

Since these are raw, not smoked, sausages, you can just split the casings open on the side and easily remove the sausage filling. Depending on your market, you may even be able to buy it in bulk without the casings at all.

Next come the aromatics (garlic and onion) and the peppers. The red bell works great in this dish for the obvious pop of color but also because red peppers are more subtly sweet than their green counterparts.

These ingredients will saute slowly, caramelizing and deepening the flavors for this killer sauce.

All the browned bits from the pan will get incorporated too, after deglazing with white wine and a little chicken stock.

To balance the sweetness, we’ll incorporate a little acid in the form of white wine vinegar and perky Peppadew peppers. These slightly spicy, bright red beauties (which I use in my Tortellini Salad too) are brined, so they add their own touch of vinegar, along with a little bit of heat.

They’re also called cherry peppers (which is what the chicken Scarpariello Serious Eats version calls for).

If you really want to up the heat in this dish, you can substitute cayenne or serranoes, which you’ll find in the chicken Scarpariello recipe Mario Batali version, but that’ll likely remove from it from your family-friendly meal options!

The herb of choice for this sauce is rosemary which is strong enough to stand out in all this richness and a nice earthy complement to the chicken and other ingredients (especially the Italian sausage).

Rosemary is a woody herb, and the leaves, even when chopped, can stay pretty tough and noticeable in your dish. I like to use the “bay leaves” trick of floating a few sprigs of rosemary in the sauce to impart the rosemary flavor in a way that still allows you to fish out most of the leaves before serving.

The Chicken Scarpariello gets finished in the oven, which allows the sauce to slowly thicken and the chicken to get up to temp.

Using the oven allows the chicken to cook more evenly than it would with the direct, one-sided heat from the stovetop.

Chicken Scarpariello is elegant enough for a special occasion but works just as well for a weeknight treat. Although it’s basically a complete meal if you have a veggie on the side, you’ll definitely want some crusty bread to dunk in the leftover sauce!

Chicken Scarpariello in a white oval plate

RECIPE NOTES FOR CHICKEN SCARPARIELLO:

No skillet, no problem – If you don’t have an oven-safe skillet, you can use an oven-proof baking dish to finish this recipe. I just recommend preheating the dish in the oven a bit before pouring your sauce into it, adding your chicken, etc. Otherwise, you may need to add some additional cooking time for the chicken to reach 165 degrees.

Side suggestions – If you want to skip the roasted potatoes, you can serve this dish with some cheesy polenta instead or just skip them both if you’re cutting carbs. Some roasted veggies – like Brussel sprouts, broccoli, or your favorite vegetable blend, would work just as well.


Chicken Scarpariello

A classic Italian-American dish, Chicken Scarpariello transforms simple chicken into a delicious dinner with a sauce so dazzling you’ll be scraping your plate to get every last drop! 

Potatoes:

  • 1 1/2 Pounds Fingerling Potatoes (Halved Lengthwise)
  • 3 Tablespoons Olive Oil
  • Salt
  • Black Pepper

Chicken:

  • 2 1/2 Pounds Chicken Thighs (Bone In and Skin On)
  • Salt
  • Black Pepper
  • 2 Tablespoons Olive Oil
  • 8 Ounces Sweet Italian Sausage (Casing Removed)
  • 1 Large Onion (Chopped)
  • 1 Red Bell Pepper
  • 6 Cloves Garlic (Minced)
  • 1 Cup White Wine
  • 1 Cup Chicken Broth
  • 1/2 Cup Peppadew Peppers in Brine (Drained and Chopped)
  • 1/4 Cup White Wine Vinegar
  • 4 Sprigs Fresh Rosemary
  • 2 Tablespoon Fresh Parsely (Chopped)
  1.  Make the Potatoes; Adjust 2 oven racks to the upper and lower thirds position and preheat it to 450 degrees. On a rimmed baking sheet, toss the cut potatoes with 2-3 tablespoons of olive oil then generously season them with salt and pepper. Arrange potatoes cut side down on the baking sheet. Roast in preheat oven, on the lower rack, until browned and tender, about 20-30 minutes.
  2. Meanwhile make the chicken; Pat chicken pieces dry with paper towels. Season the chicken generously with salt and pepper. Heat 2 tablespoons olive oil in a large cast iron skillet over medium heat. When it begins to shimmer, add the chicken, skin side down and cook without moving until well browned, about 3-5 minutes. Turn the chicken over and brown on the other side, adjusting the heat as needed, about 3 minutes. Remove chicken to a plate and set aside. Leave oil in the skillet.
  3. Add sausage to skillet and cook over medium heat, breaking it up into 1/2 inch pieces, until its browned, about 3 minutes. Remove sausage to a paper towel lined plate and set aside. Remove skillet from heat and pour off all but 2 tablespoons of fat.
  4. Return the skillet to medium heat and add the onions, red bell pepper, and garlic and cook, stirring occasionally, scrapping up any brown bits on the bottom of the pan, until the vegetables are soft, 10-12 minutes. Add the wine and continue to cook, stirring occasionally, until most of the wine has evaporated, about 8 minutes. Add broth, Peppadews, vinegar and rosemary and bring to a boil. Reduce heat and vigorously simmer until slightly reduced, about 5 minutes.
  5. Add chicken back to skillet, along with any accumulated juices, and nestle pieces into onion mixture. Place uncovered in preheated oven for 10 minutes. Add sausage to pan, pushing them down into onion mixture and continue to roast until chicken is cooked through, about 5-10 minutes and an instant read thermometer inserted into the thickest part of the chicken reads 165 degress.

Source: Adapted from Bon Appetite

The post Chicken Scarpariello Recipe appeared first on Gonna Want Seconds.

Smothered Chicken Recipe-A Southern Specialty

$
0
0

Gravy finally gets the recognition it deserves as the indulgent star of my Smothered Chicken. Tender pieces of poultry, braised in this creamy condiment, turns meal time into “mmmm” time. This Southern Smothered Chicken with Gravy will bring the family to the dinner table in a flash!

Is there anything “gooder” than gravy? There’s a reason you find it used in dishes for lunch, dinner, and breakfast. If they bottled it and sold it in a squeeze container next to the ketchup and mustard, it’d be on all our tables at every . . . single . . . meal.

There is something “gooder,” though – something that’s actually cooked in the gravy! That’s the mouthwatering premise behind the most comforting of all comfort foods, my Smothered Chicken.

Smoothered Chicken on a large white oval platter

WHAT IS SMOTHERED CHICKEN?

Leave it to Southern cooks, or at least the fine Cajuns in Louisiana, to develop the “smothered” technique, a way to transform pan juices into a rich, flavor-packed gravy that elevates whatever’s cooking inside it to soul-soothing status.

The process basically pan-fries something – could be pork or chicken, wild game like venison or quail, or even vegetables like okra, makes an epic gravy with the pan drippings, then nestles the pan-fried thing into the big ol’ pot of awesome to finish cooking.

This decadent braising transforms meat into tender, tantalizing morsels (or manages to make something like good-for-you veggies a little less healthy, LOL), while the whole dish thickens and concentrates flavors into the kind of creamy concoction foodie dreams are made of.

There are some “short-cut” recipes that use mushroom or other cream-based canned soups to create the gravy, things like baked smothered chicken, smothered chicken crockpot style, and smothered chicken and rice. Since these versions bypass the pan-frying step altogether, the cooking methods just aren’t conducive to making a homemade gravy without a little help from the stuff in the can.

With my recipe, we can make an easy Smothered Chicken right on the stovetop that coaxes all the flavor out of the chicken with no cream-of-this-or-that required.

True Southern smothered chicken uses a whole, cut-up chicken (instead of just smothered chicken breast or thigh pieces), which are dusted lightly with flour, browned in oil, then cooked in a fragrant, homemade chicken gravy.

Smoothered Chicken on a large white oval platter

HOW DO YOU MAKE HOMEMADE CHICKEN GRAVY?

Gravy is really such a simple thing to make, with so much natural flavor, it’s a wonder it’s not a more-frequently used condiment.

There are two types of gravy – pan gravy and thickened gravy, which both rely on flavorful pan juices and drippings to build the base. The latter, which requires something to help “thicken” all that tasty stuff in the pan, is the glorious glue that brings this whole dish together.

To make homemade chicken gravy, you basically need some fat, some aromatics, flour or an alternative starchy thickener, plus a little chicken stock.

For this particular recipe, we’ll start with some of the vegetable oil our chicken was fried in. That oil has been enriched with some of the chicken fat that’s melted during the cooking process, plus some of the salt and pepper that managed to sneak off the chicken.

As a base, it doesn’t get more flavorful than that!

Next, we’ll saute our aromatic component, comprised of the usual suspects: onions, garlic, celery, and carrots, in this lovely liquid. These classic “mirepoix” ingredients will soften enough to release their natural oils and flavors into the gravy but still leave a little texture in the finished product.

Even though some recipes like the Patti Labelle smothered chicken version omit the carrots, I think they add a subtle sweetness to the gravy that reminds me of a classic chicken pot pie.

Next comes the flour, and it’s used as the primary thickener in this dish. We’re basically creating a roux here, though we won’t cook it to a dark stage like you’d want for a gumbo. We just want to eliminate the raw flour taste and allow it to marry the leftover fat in the pan well enough for the gravy to emulsify.

Our homemade gravy needs some liquid, and I use a good quality chicken stock. The smothered chicken Paula Deen makes uses milk instead of broth, which makes a nice creamy gravy but it lacks the depth you’ll achieve by using a seasoned liquid.

And, speaking of seasoning, this gravy is seasoned simply with just a touch of cayenne pepper and poultry seasoning, that spice we only pull out once a year for Thanksgiving stuffing. The primary ingredient in poultry seasoning is sage, and you’ll find some recipes (like the smothered chicken Cooks Country version) only use sage in the smothering sauce.

The truth is poultry seasoning has several other herbs like rosemary and thyme that help complement the chicken too (or that Thanksgiving turkey), so it’s a great blend to use in this dish.

CAN YOU MAKE GRAVY WITHOUT FLOUR?

There are other thickeners you can substitute for the flour in this recipe if you have a gluten sensitivity. Sweet rice flour (or white rice flour if you can’t find the sweet variety) will work as a one-to-one substitute in the gravy here.

The starch content is even a little higher than a wheat flour, so you may find it’s even smoother than what you’re used to.

You can also thicken the gravy with a slurry of water and cornstarch, which works great in Asian-style sauces like my Honey Garlic Chicken, but I find it changes the mouthfeel of this gravy quite a bit.

The browned chicken pieces will finish cooking in this velvety mixture and be close to falling-off-the-bone tender. Just be sure to keep the mixture at a simmer and don’t let the gravy boil once the chicken’s been added or else the chicken pieces can toughen instead.

You’ll also want to add any juices that have accumulated in the plate your chicken’s resting on – we don’t want to waste a bit of flavor!

I like to garnish my Smothered Chicken with chopped parsley which adds a nice pop of color, and either dry or fresh will work here. If you’re feeling particularly frisky, you can even crumble six or eight pieces of cooked bacon on top.

Smoothered Chicken on a large white oval platter

RECIPE NOTES FOR SMOTHERED CHICKEN:

The sum of its parts: If you’re partial to one particular part of the chicken, you can use all breasts (like I do in my Buttermilk Roasted Chicken) or all thighs and legs.

Just choose bone-in pieces of chicken to ensure they have maximum flavor and cook more evenly.

Dusting – Flouring the chicken before pan-frying accomplishes two things.

First, it helps provide a little texture for the outside of the chicken that will ultimately help the gravy cling to it. Second, some of that flour will fall off into the oil and aid the thickening process later on.

What you don’t want to do is over-flour the chicken, though.

The flour that falls off is more susceptible to burning which can make the gravy taste bitter. To avoid this, be sure to shake off any excess flour (I like to knock the pieces together or against a dish) before you gently plop the chicken pieces into the hot oil.

Also watch the temperature carefully and adjust it, if necessary, to avoid over-browning the bits floating in the oil.

Smotherable sides – I’m pretty sure it’s a sin not to serve this with mashed potatoes (since gravy’s its soulmate), but tender egg noodles or steamed rice work well too.

For a little veggie side, I suggest something in keeping with the Southern theme of this recipe like stewed okra, collard greens, or my Southern Green Beans.

Southern Style Green Beans

Source: Adapted from Allrecipes/Cooks Country

Smothered Chicken

Gravy finally gets the recognition it deserves as the indulgent star of my Smothered Chicken. Tender pieces of poultry, braised in this creamy condiment, turns meal time into “mmmm” time. This Southern Smothered Chicken with Gravy will bring the family to the dinner table in a flash!

  • 1- 3-4 Pound Whole Chicken, Cut Into 8 Pieces
  • Salt
  • Pepper
  • 3/4 Cup Plus 3 Tablespoons All-Purpose Flour~Divided
  • 1/4 Cup Vegetable Oil
  • 2 Cups Yellow Onion (Chopped)
  • 1 Cup Celery (Chopped)
  • 3 Cloves Garlic (Chopped)
  • 2 Cups Carrots (Chopped)
  • 3 Cups Chicken Broth
  • 1/2 Teaspoon Poultry Seasoning
  • 1/4 Teaspoon Cayenne Pepper
  • 2 Tablespoon Fresh Parsely (Chopped)
  1. Pat chicken pieces dry with paper towels. Sprinkle chicken pieces with 1 teaspoon salt and  1/2 teaspoon pepper. In a shallow bowl, spread 3/4 cup all-purpose flour. Dredge chicken pieces, one at a time, in flour mixture, shaking off any excess.
  2. Heat vegetable oil in a Dutch oven over medium high heat. Add half the chicken pieces, skin side down, cooking 4-6 minutes until nicely browned. Remove browned chicken to a plate. Repeat with remaining chicken pieces, adjusting heat as need, so not to burn the flour.
  3. Pour off all but 3 tablespoons of the oil. Reduce the heat to medium low and add the onions, celery, garlic and carrots and cook until veggies are soft, 7-8 minutes. Sprinkle remaining 3 tablespoons of all-purpose flour over veggies and stir to combine. Continue to cook for 1 minute. Mix in broth, poultry seasoning, cayenne pepper, 2 teaspoon salt, 1/4 teaspoon black pepper. Bring to a boil and reduce heat to low. Nestle chicken pieces into sauce along with any accumulated juices. Partially cover and simmer chicken 30-40 minutes, or until cooked through and tender.
  4. Transfer chicken to a deep platter. Adjust gravy seasoning if needed, then pour over chicken. Sprinkle with parsley and serve.

The post Smothered Chicken Recipe-A Southern Specialty appeared first on Gonna Want Seconds.

Easy Taco Chili Recipe

$
0
0

Taco Chili – it’s the chili that the whole family will love! This warm and chunky chili, seasoned like your favorite taco filling, is a one-pot wonder and guaranteed dinner favorite.

Imagine taco night with just one dirty pot! Spicy ground beef, chilies, beans and tomatoes, with all the classic Tex-Mex flavors – Taco Chili’s a game-changer for busy weeknights (with killer leftovers, too), and you won’t miss those taco shells!

Yes, it’s basically a taco served in a bowl, and some even call it “taco chili soup,” but it’s definitely a thick, chunky dish, not something thinner and brothy-er like a chicken tortilla soup.

You can pull this hearty, home-cooked meal together in about the time it takes to raid your pantry, and no one will ever know you didn’t camp out in the kitchen all day.

HOW DO YOU MAKE TACO CHILI?

Making Taco Chili couldn’t be a simpler. It’s one of those “dump” recipes that combines a little browned ground beef and onions with beans, taco seasoning, green chilies, tomatoes, and corn – all store-bought, time saving items. It just needs an hour for the flavors to come together and dinner is served!

I have a few ingredients in my Taco Chili recipe that sets it apart from others, though, and I think you’ll find they really add something special to this exceptionally simple dish.

This quick Taco Chili recipe starts with ground beef and chopped onions, sautéed in the fat from the beef so the onions get really flavor-packed right away. The only other prep work you’ll need to do for this recipe is pull out your can opener!

We’ll add diced green chilies (either mild or spicy depending on how hot you like it) and two different kinds of beans: kidney and chili beans.

Chili beans are a wonderful invention, different varieties of canned beans (pinto, kidney, even black beans) pre-seasoned with chili powder, cumin, and other “chili” spices. Depending on the brand, they can also span the heat spectrum from mild to spicy, so feel free to pick and choose whatever you like.

Since I’m already using kidney beans in this recipe, I usually choose seasoned pinto or black beans to add some variety to the chili. (You can also substitute regular black or pinto beans for the kidneys if you’re feeling creative.)

The other traditional veggie in Taco Chili is corn, and regular readers know how much I love the combination of sweet yellow kernels with Mexican-style dishes like my Mexican Spaghetti.

Rather than sticking with kernels in this dish, though, I use hominy to impart the same corn flavor with a more interesting, meatier texture.

If you’re not familiar with hominy, which is used in the classic Mexican-style soup pozole, it’s about the size of a chickpea and has a slightly softer, almost chewy quality.

To make hominy, they soak dried kernels of white or yellow corn in an acidic solution (usually made with lime juice). That process breaks down the corn and makes it stick together when it’s ground, which is how they make masa and those crispy taco shells you’d be having on a traditional taco night.

Before it’s ground, the corn is plump and fluffy, and that’s what we’ll be using in this chili.

You’ll usually find it in either the canned vegetable section at the grocery store or in the Latin section (with chipotle peppers and other Mexican ingredients).

For the tomatoes, we have two choices: use Rotel tomatoes (like a lot of the taco chili Allrecipes versions) or use our own combination of tomatoes and green chilies. I’ll admit I often prefer the latter (which is why you’ll see it in dishes like my Dorito Casserole), and that’s what I use in this recipe.

I find Rotel is a little more watery and less tomato-y, which is fine for my queso, but I want plenty of tomato juice (and flavor) in this chili, so I use my own combo rather than a pre-mixed one.

To season, we’ll start with a packet of taco seasoning mix, full of onion, cumin, chili powder (it wouldn’t be taco seasoning without chili powder), garlic and other spices, depending on the brand.

Some cooks like to build on the whole seasoning packet thing and make a taco ranch chili, which is basically a taco chili with ranch dressing mix (the taco chili recipe Paula Deen makes uses this). While we all know what a miraculous thing ranch dressing is, and there’s no doubt it adds a flavorful, slightly creamy quality to this dish, I have a different trick up my sleeve that intensifies the “chili” flavors: enchilada sauce.

Store-bought enchilada sauce makes short work of homemade enchiladas, but it’s also a great way to add a bit of concentrated “you-must-have-cooked-this-all-day” flavor to other dishes. It boasts a variety of chilies – red, pasilla, guajillo, or hatch – which gives it a deep, earthy flavor that’s a little acidic too. I like to use a mild red variety in this recipe, but you can definitely experiment with a spicy version.

Set it and forget! Dinner will cook away on the stove top while you’re off planning dessert or prepping a few toppings. Pretty much any taco-style toppings will work on this Taco Chili, things like sliced avocado, chopped cilantro, lime slices, cotija cheese (which is also great in my Mexican Corn Salad), or even a dollop of sour cream.


WHAT SIDES DO I SERVE WITH TACO CHILI?

Taco Chili kinda begs for crispy tortilla chips, but you can also serve it with a warm quesadilla (or, as I like to call it, Mexican grilled cheese) or a slice of jalapeno cornbread.

Fritos work well too, or you can make your own flavored tortilla strips!

Just slice flour tortillas into ½-inch slices and toss them in a little olive oil, then season with salt and pepper, a sprinkling of chili powder, or even a little extra taco seasoning mix. Spread into a single layer on a cookie sheet and bake at 375 degrees for 10 – 15 minutes, tossing about half-way through, until they’re crispy.

Just don’t eat them all before dinner time!

CAN YOU FREEZE TACO CHILI?

Taco Chili freezes really well, and it’ll keep in the freezer for at least 4 – 6 months. For best results, make sure the chili cools completely first and use a properly sealed container. Because it does freeze so well, you can also double this recipe and pack your freezer for an extra-fast dinner later.

The next time you’re craving fast-food taco take out – like some Del Taco chili cheese fries or a Taco Bell chili cheese burrito, just put on a pot of this Taco Chili instead. It’ll hit all the right taste buds for your Mexican food kick without a trip through the drive-thru!

RECIPE NOTES FOR TACO CHILI:

Other cooking options – This is the perfect dish to use a slow cooker for (which is the method Weight Watchers taco chili uses). You’ll just need to brown your ground beef and onion, then put everything into your crockpot and cook on low for 6 – 8 hours or on high for 3 – 4.

You can also cook it in an Instant Pot using the saute setting to cook your beef and onion, then add the rest of the ingredients and use the “soup” setting for 10 minutes. You’ll want to let it naturally release the steam for 5 minutes, then finish releasing the pressure yourself and serve.

Where’s the beef – if you’d prefer to use something other than beef, you can substitute ground turkey or turn it into a taco chicken chili recipe using leftover chunks of chicken. If you’re going to use the slow-cooker method, you can also just add two pounds of raw boneless breasts or thighs with the other ingredients and let the chicken cook (and shred!) in the crockpot.

To make a lower fat version, you can skip the meat altogether and add cooked red lentils, squash, or other veggies to make a vegetarian version.


Easy Taco Chili Recipe

Taco Chili – it’s the chili that the whole family will love! This warm and chunky chili, seasoned like your favorite taco filling, is a one-pot wonder and guaranteed dinner favorite.

  • 2 Pounds Ground Beef
  • 1 Chopped Onion
  • 1 Teaspoon Salt
  • 1/2 Teaspoon Black Pepper
  • 1 Envelope Mild Taco Seasoning
  • 1 Can (7 Ounces Diced Green Chilies)
  • 1 Can (15 Ounces Hominy, Drained and Rinsed)
  • 2 Cans (15 Ounces Chili Beans With Sauce)
  • 1 Can (15 Ounces Kidney Beans)
  • 2 Cans (14.5 Ounces Petite Diced Tomatoes, Including Juice)
  • 1 Can (10 Ounces Red Enchilada Sauce)
  1. In a large, high sided skillet, saute the ground beef and onion until there is no longer any pink in the beef. Drain.
  2. Sprinkle the beef with salt, pepper and taco seasoning. Add green chilies, hominy, chili beans, kidney beans, diced tomatoes, and enchilada sauce. Stir to combine. Bring mixture to a boil over high heat. Reduce heat and simmer on low, 1 hour partially covered, stirring occassionaly to prevent sticking.

The post Easy Taco Chili Recipe appeared first on Gonna Want Seconds.

Viewing all 500 articles
Browse latest View live


Latest Images